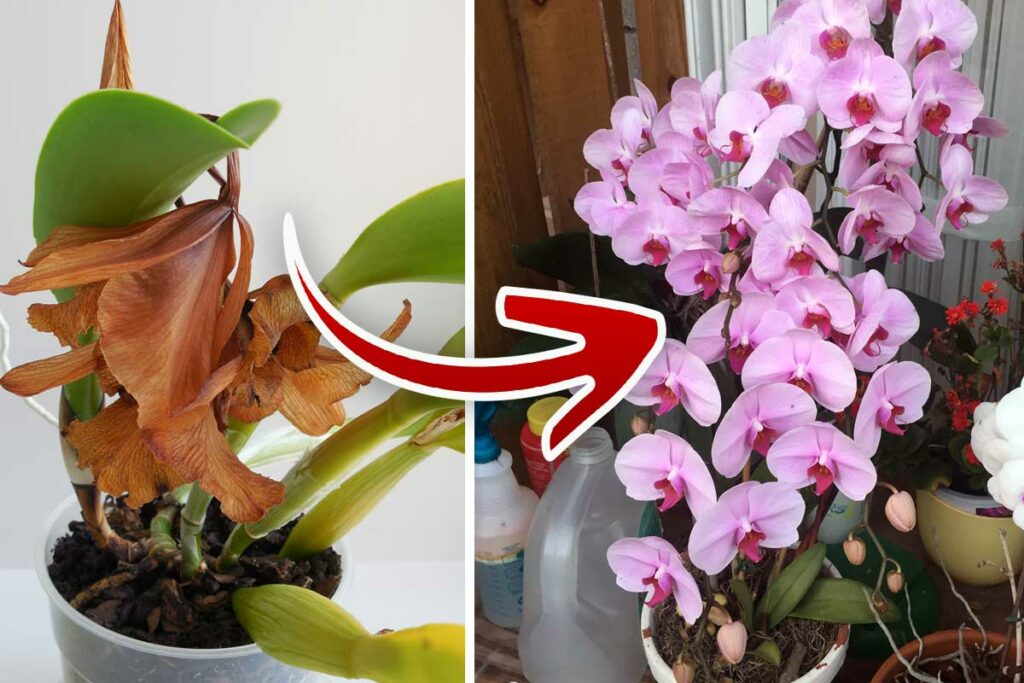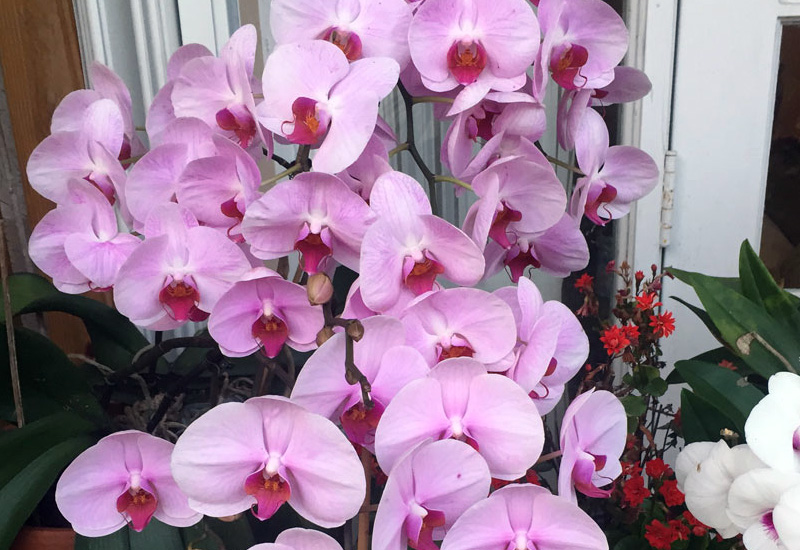
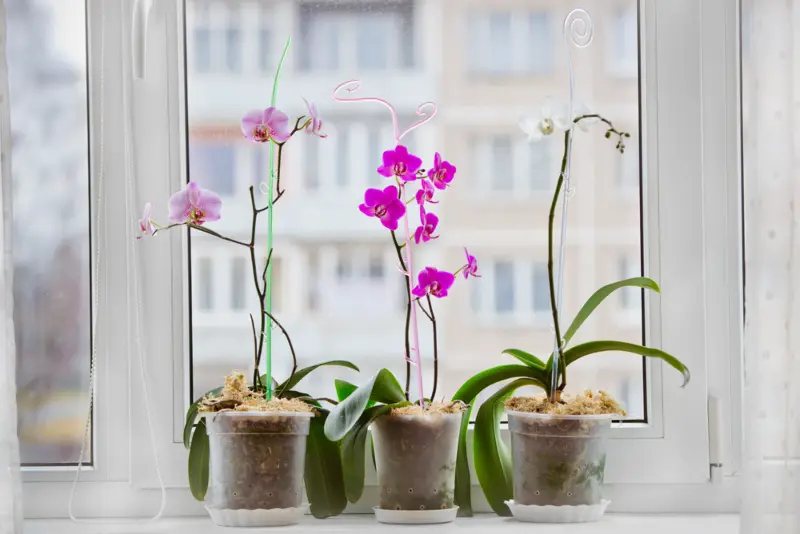
Here’s a confession from fellow orchid enthusiasts: most of us have killed more orchids with kindness than neglect. We see those elegant blooms at the grocery store, bring them home with the best intentions, and then proceed to love them to death with our well-meaning watering routines.
The truth about orchid watering might shock you – these exotic beauties don’t follow the same rules as your other houseplants. While your pothos happily gulps down weekly waterings and your snake plant forgives the occasional flooding, orchids have evolved completely different survival strategies that make conventional watering wisdom downright deadly.
What makes orchid watering so different? Most orchids are epiphytes in nature, meaning they grow on tree branches in tropical forests where their roots are exposed to air and receive only periodic drenching from rainfall.
Understanding this natural lifestyle is the key to keeping your orchids healthy and blooming for years to come.
Today, we’ll explore the watering methods that spell disaster for orchids, and more importantly, the techniques that will transform you from an orchid killer into an orchid whisperer!
The 5 Watering Methods That Kill Orchids (Stop Doing These!)
1. Daily Light Misting “To Keep Them Humid”
This might be the most well-intentioned mistake orchid owners make. You’ve heard that orchids need humidity, so you dutifully mist them every day, thinking you’re recreating their tropical homeland. Unfortunately, this gentle approach can lead to serious problems.
But why is misting problematic? Light, frequent misting keeps the potting medium constantly damp without ever allowing it to dry out properly. This creates the perfect environment for bacterial and fungal problems, particularly in the crown of the plant where water can collect.
The crown rot danger: When water sits in the center of the plant (the crown) for extended periods, it can cause crown rot – one of the fastest ways to kill an orchid. This is especially problematic with Phalaenopsis orchids, where the leaves form a cup that can trap moisture.
Surface-level hydration: Light misting only wets the surface of the bark, never reaching the roots where the plant can use the water. Your orchid remains thirsty while sitting in a breeding ground for problems.
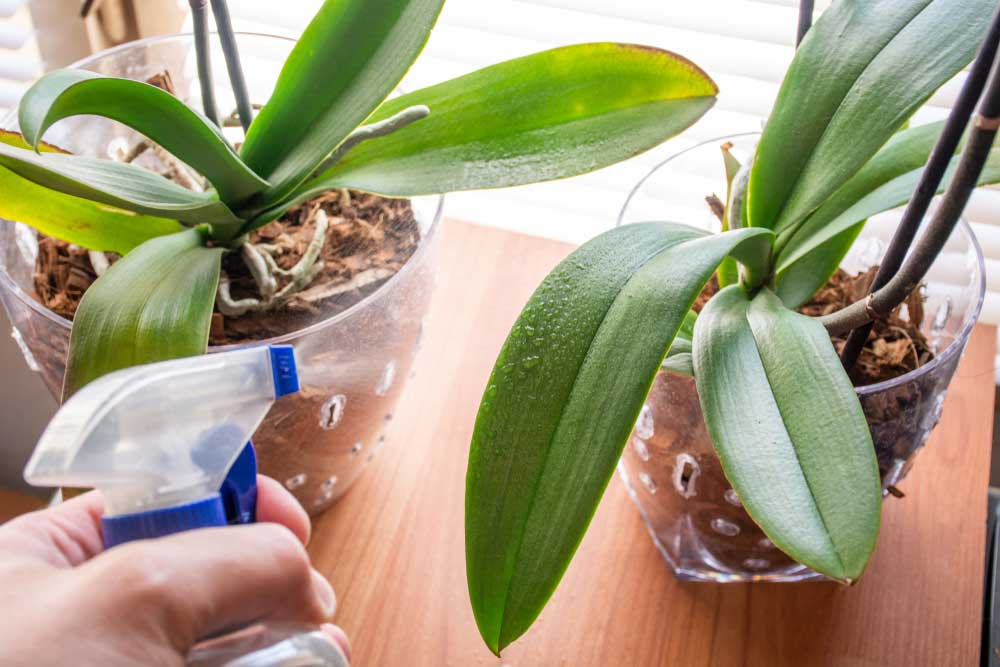
Better humidity solution: Instead of misting, use humidity trays filled with pebbles and water, or group plants together to increase local humidity without wetting the leaves and potting medium.
2. Following a Rigid Weekly Schedule

Many new orchid owners read that orchids should be watered “once a week” and stick to this schedule religiously, regardless of what their plant needs. This calendar-based approach ignores the fundamental rule of orchid care: water when the plant needs it, not when the calendar says so.
Environmental variables: Your home’s temperature, humidity, air circulation, and seasonal changes all affect how quickly orchid potting mix dries out. A schedule that works in humid summer might be too frequent in dry winter conditions.
Bark versus moss considerations: Orchids in bark-based mixes dry out much faster than those in sphagnum moss, yet many people follow the same watering schedule for both.
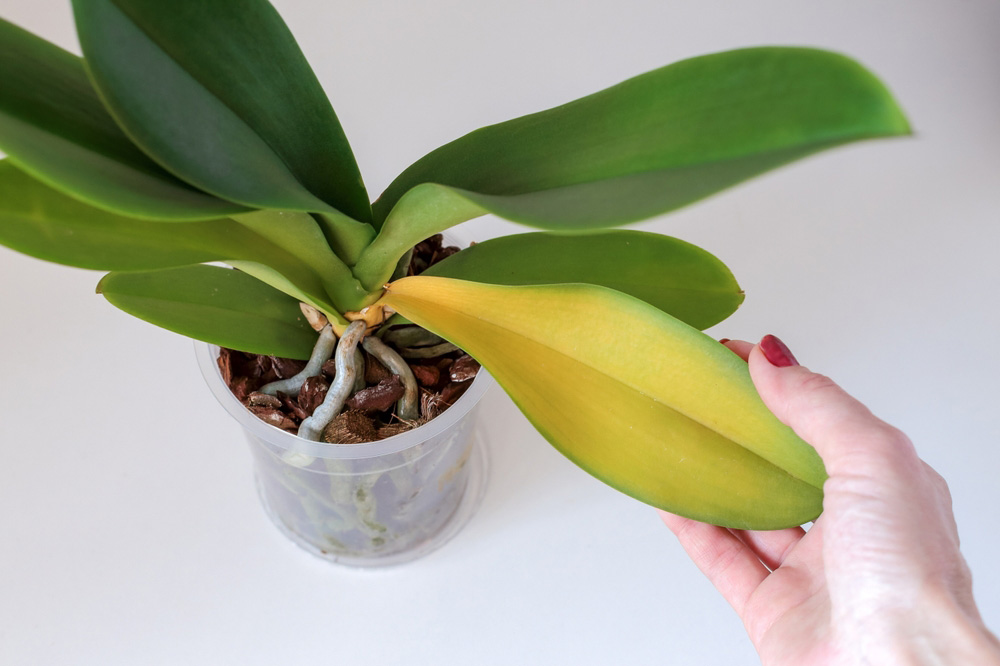
Plant stress indicators: Rigidly scheduled watering often leads to either chronically overwatered orchids (showing yellowing leaves and mushy roots) or stressed, dehydrated plants (with shriveled pseudobulbs and silver-gray aerial roots).
The better approach: Learn to read your orchid’s signals. Check the potting medium moisture level, observe root color changes, and adjust watering frequency based on what the plant tells you it needs.
3. Using Ice Cubes as Your Primary Method
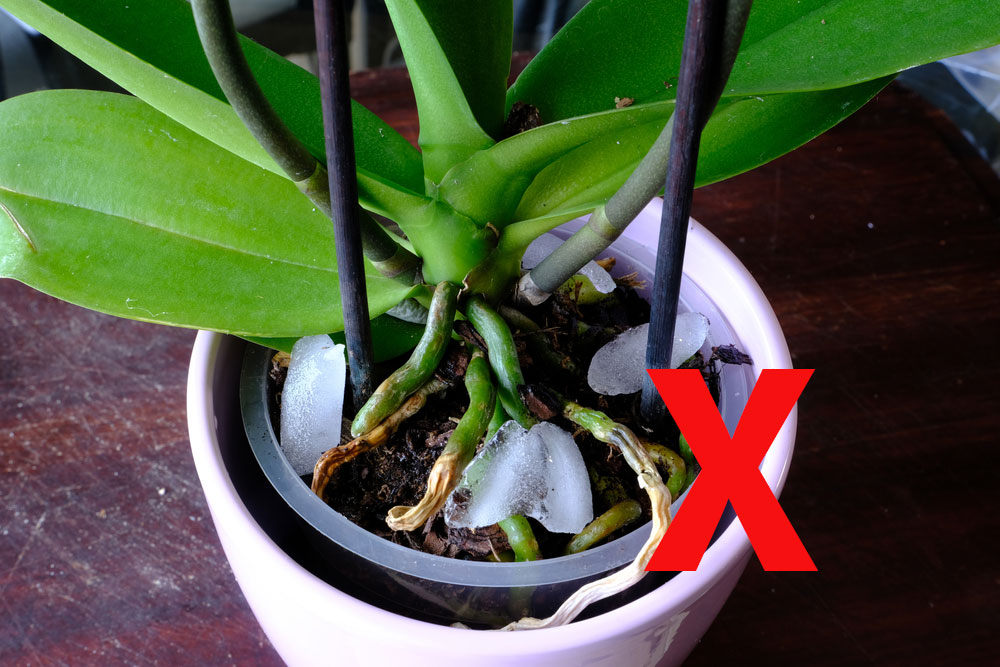
The ice cube method has gained popularity as an “easy” way to water orchids without overwatering. While some research suggests it won’t immediately kill healthy orchids, relying exclusively on ice cubes fails to meet these plants’ watering needs.
Inadequate water volume: Three ice cubes provide roughly 2-3 tablespoons of water – barely enough to wet the surface of most orchid potting mixes, let alone provide the thorough soaking that orchid roots need.
Cold shock concerns: Orchids are tropical plants adapted to warm rainfall. While cold water won’t instantly kill them, it can stress the roots and slow nutrient uptake, particularly in already stressed plants.
Surface-only watering: As ice cubes melt slowly on top of bark, much of the water runs off the surface rather than penetrating deep into the root zone where it’s needed.
Missing the flush benefit: Proper orchid watering should flush out accumulated salts and provide a thorough drink. Ice cubes simply can’t accomplish this essential function.
4. Watering in the Evening or Late Afternoon
Timing matters more with orchids than with most houseplants. Evening watering keeps the potting medium moist overnight when temperatures are cooler and air circulation typically decreases – creating perfect conditions for bacterial and fungal problems.
Reduced evaporation: Lower nighttime temperatures mean water sits longer in the potting medium and around roots, increasing the risk of rot in these moisture-sensitive plants.
Stagnant air issues: Many homes have less air movement at night, which compounds the problem of lingering moisture around orchid roots and in the crown.
Natural cycle disruption: In nature, orchids typically receive water from afternoon or evening thunderstorms, but they also benefit from strong air movement and quick drying. Indoor conditions can’t replicate this natural air circulation.
Optimal timing: Water orchids in the morning so they have all day to dry out properly. This mimics their natural environment where morning dew and afternoon rains are followed by drying periods.
5. Letting Orchids Sit in Standing Water
This classic houseplant mistake is particularly deadly for orchids. Many people place their orchids in decorative cache pots or saucers and forget to empty excess water, creating a soggy environment that these air-loving plants cannot tolerate.
Root rot development: Orchid roots need air as much as water. When they sit in standing water, the lack of oxygen quickly leads to root rot – brown, mushy roots that can no longer absorb water or nutrients.
Salt accumulation: Standing water allows fertilizer salts to concentrate around roots, potentially burning these sensitive structures and further compromising plant health.
Bacterial breeding ground: Stagnant water provides ideal conditions for harmful bacteria that can infect stressed orchid roots and spread throughout the plant.
Deceptive plant signals: Ironically, orchids suffering from root rot often show signs that look like underwatering (wilting, yellowing leaves) because damaged roots can’t absorb water effectively.
The 5 Watering Methods That Keep Orchids Thriving (Do These Instead!)
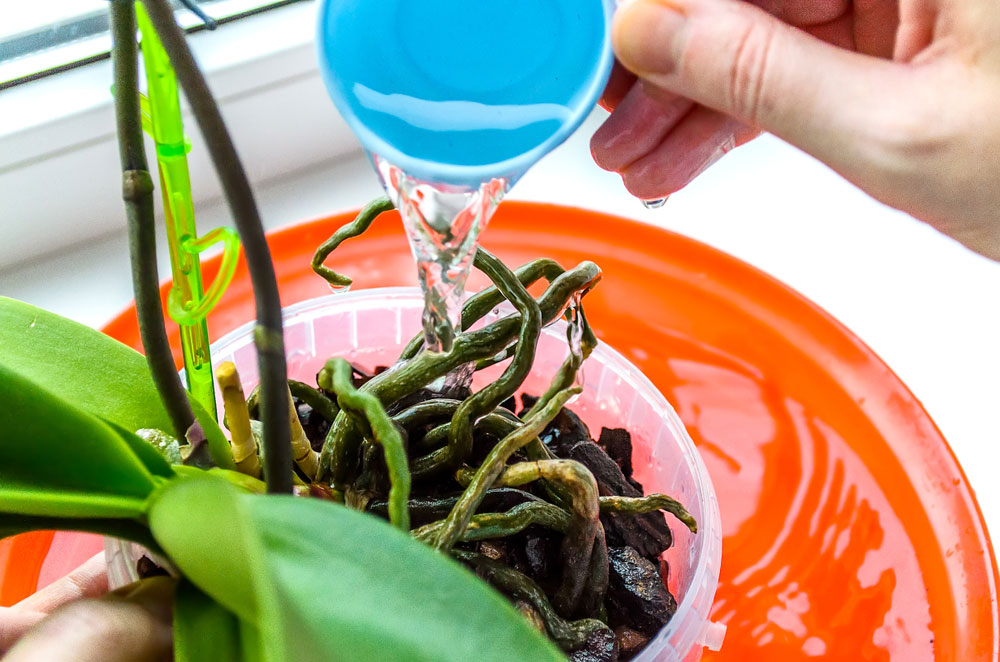
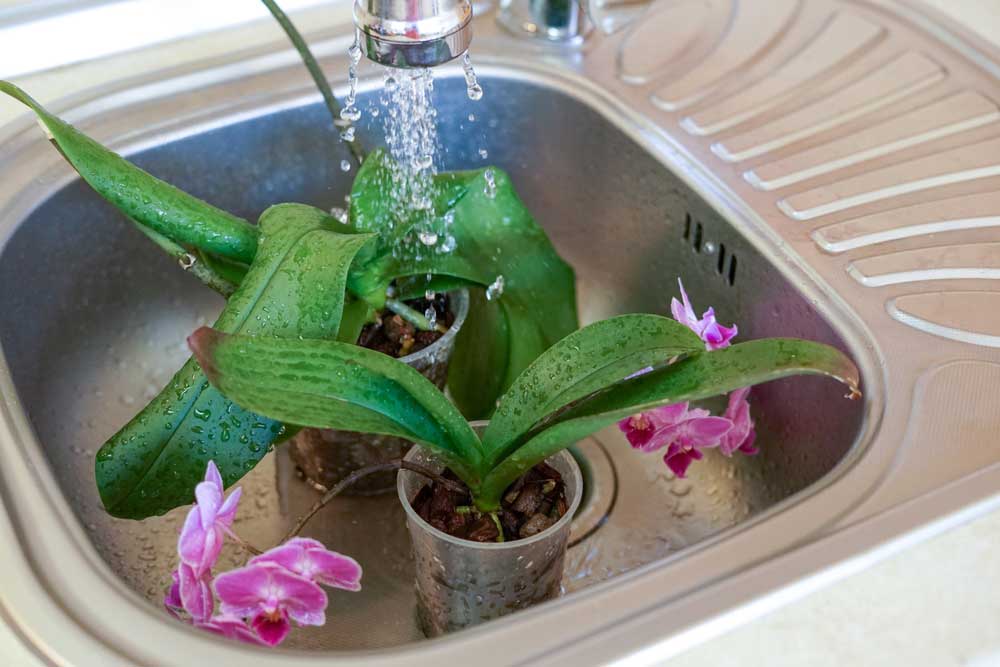
1. The Thorough Soak and Drain Method
This technique mimics the heavy tropical downpours that orchids experience in nature, followed by quick drainage and air circulation. It’s the gold standard for orchid watering that ensures roots get both adequate moisture and essential oxygen.
The process: Take your orchid to the sink and run lukewarm water through the potting medium for 30-60 seconds, ensuring water reaches all the roots. Allow the plant to drain completely for 10-15 minutes before returning it to its decorative pot.
Temperature matters: Use lukewarm water (around room temperature) rather than cold water. This feels more natural to tropical plants and encourages better root absorption.
Drainage is crucial: Never skip the draining period. Orchid roots need to transition from wet to merely moist, then to almost dry before the next watering.
Frequency guidelines: For most Phalaenopsis orchids, this thorough watering every 7-10 days works well, but always check the potting medium moisture level rather than following a strict schedule.
2. The Submersion Method for Mounted Orchids
Orchids mounted on cork bark or tree fern require different watering approaches since there’s no potting medium to hold moisture. The submersion method provides thorough hydration while respecting their epiphytic nature.
How it works: Submerge the entire mount in a container of lukewarm water for 10-15 minutes, allowing the roots and mounting material to absorb moisture thoroughly.
Timing considerations: Mounted orchids typically need this treatment 2-3 times per week since they have no moisture-retaining medium around their roots.
Air circulation importance: After submersion, ensure mounted orchids have excellent air circulation to dry quickly. This prevents fungal issues while providing the humid conditions these plants love.
Seasonal adjustments: Increase frequency during hot, dry periods and reduce during cool, humid seasons. Watch the roots for color changes – green means hydrated, silver-gray indicates thirst.
3. The Morning Glory Technique
Water your orchids first thing in the morning, giving them the entire day to process moisture and begin drying before evening. This natural timing supports healthy growth and prevents the moisture-related problems that plague many orchid collections.
Optimal timing window: Early to mid-morning (7-10 AM) provides the best balance, allowing orchids to absorb water during their most active period while ensuring adequate drying time.
Natural cycle alignment: This timing matches how orchids receive moisture in nature – morning dew and mid-day tropical showers followed by afternoon drying.
Health benefits: Morning watering allows you to observe your plants during their most active period, making it easier to spot problems early and adjust care accordingly.
Practical advantages: Watering in the morning fits well with most people’s schedules and ensures you won’t forget to check drainage later in the day.
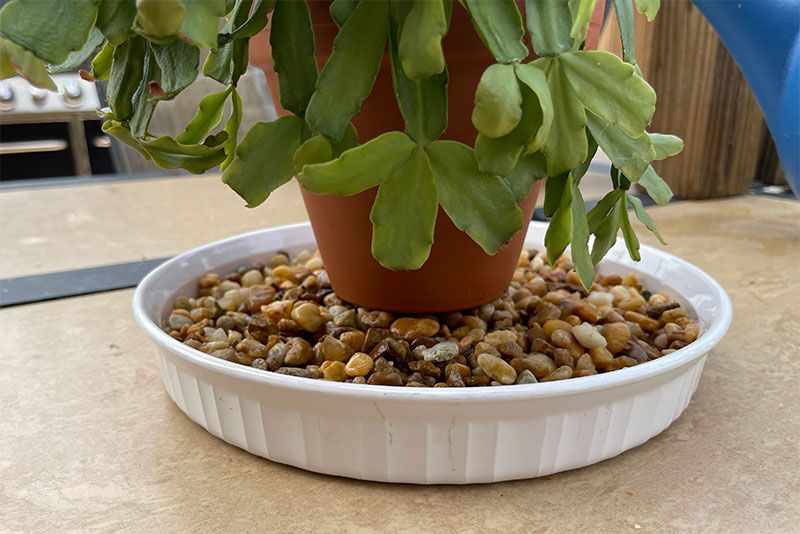
4. The Humidity Tray System
While not a watering method per se, humidity trays provide consistent moisture in the air around orchids without wetting the plants themselves. This addresses their need for humid conditions while preventing the problems associated with direct misting.
Setup method: Fill shallow trays with pebbles or gravel and add water until it reaches just below the top of the stones. Place orchids on top so pots sit above the water line.
Evaporation benefits: As water evaporates from the tray, it creates a humid microclimate around your orchids without making their potting medium soggy.
Maintenance routine: Check and refill humidity trays every few days, cleaning them periodically to prevent algae growth and maintain optimal function.
Seasonal value: Humidity trays are especially valuable during winter when indoor heating systems create desert-like conditions that stress tropical orchids.
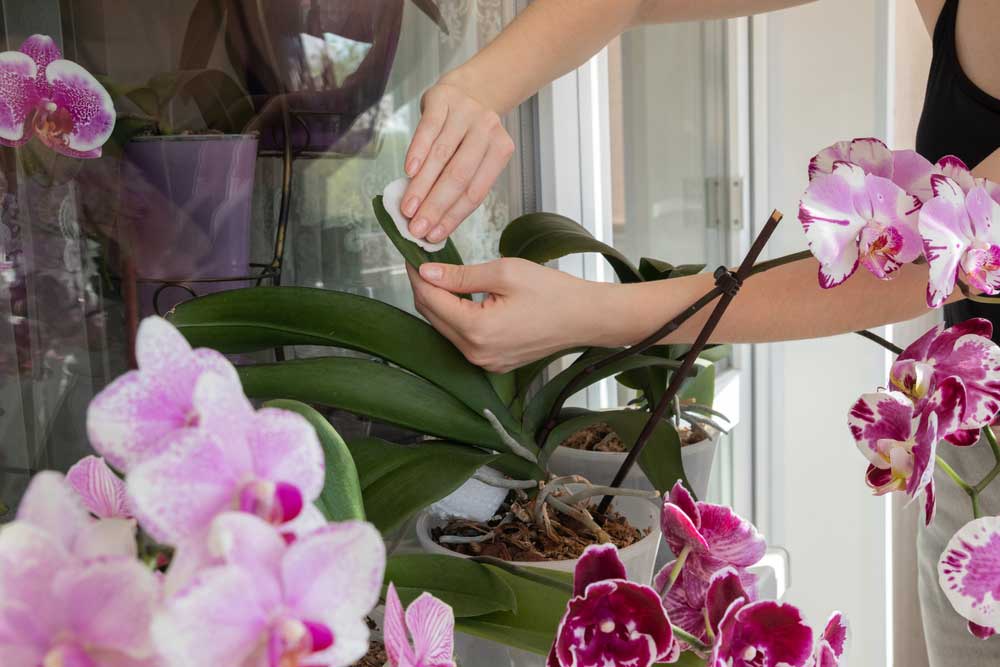
5. The Quality Water Approach

The type of water you use can make or break your orchid success. These sensitive plants prefer pure water that’s free from the chemicals and minerals found in many municipal water supplies.
Best water sources: Rainwater is ideal, followed by distilled water, reverse osmosis water, or water from dehumidifiers. These sources provide pure hydration without harmful additives.
Tap water considerations: If you must use tap water, let it sit overnight to allow chlorine to evaporate, though this won’t remove fluoride or excessive minerals that can harm sensitive orchid roots.
Temperature importance: Whatever water source you choose, ensure it’s at room temperature or slightly warm. Cold water can shock tropical orchid roots and reduce their ability to absorb nutrients.
TDS monitoring: For serious orchid growers, testing water’s total dissolved solids (TDS) helps ensure water quality stays below 150 ppm – the threshold where mineral buildup can begin harming orchids.
Reading Your Orchid’s Water Needs
Learning to interpret your orchid’s signals eliminates guesswork and prevents both over and underwatering:
Signs your orchid needs water:
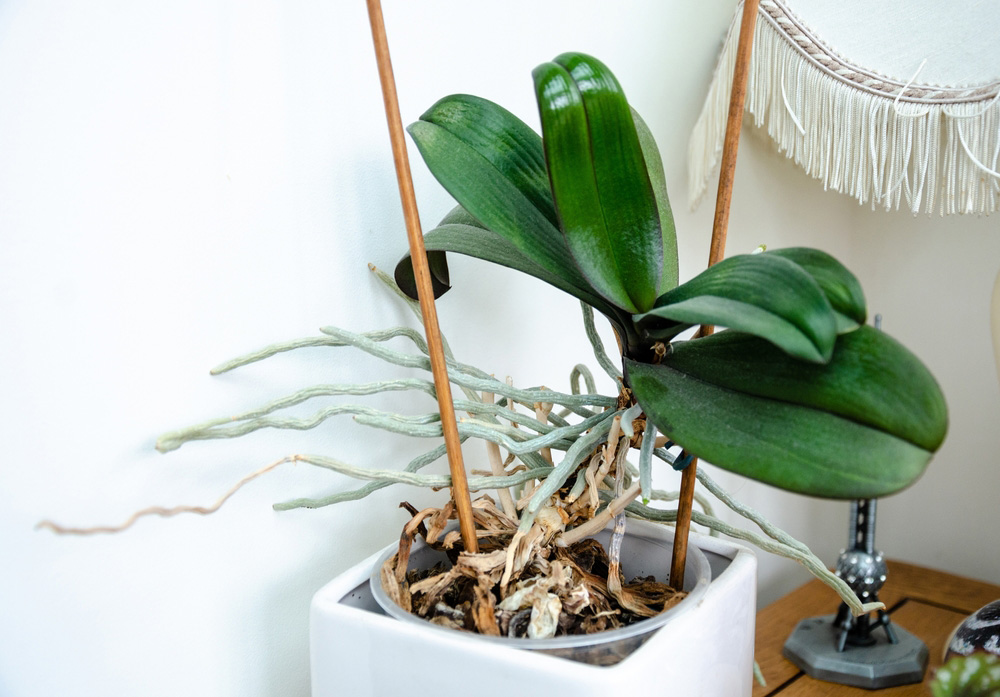
- Aerial roots appear silver-gray instead of green
- Potting bark feels dry when you insert your finger
- Pseudobulbs (if present) begin to look slightly wrinkled
- The pot feels noticeably lighter than when freshly watered
Signs your orchid is overwatered:
- Roots appear brown, black, or mushy
- New growth is soft and weak
- Leaves turn yellow and drop prematurely
- A musty odor emanates from the potting medium
| ❌ WRONG Methods | ✅ RIGHT Methods |
|---|---|
| Daily Light Misting | Thorough Soak & Drain Method |
| Rigid Weekly Schedule | Water When Plant Needs It |
| Ice Cube Primary Method | Lukewarm Water Soaking |
| Evening/Night Watering | Morning Watering (7-10 AM) |
| Standing Water in Saucers | Complete Drainage + Humidity Trays |
FAQ: Mastering Orchid Hydration
Q: How can I tell if my orchid’s roots are healthy?
Healthy orchid roots should be firm and either bright green (when wet) or silver-white (when dry). Brown, black, or mushy roots indicate overwatering and potential root rot. Some aerial roots may appear slightly wrinkled when dry – this is normal.
Q: What should I do if I’ve been overwatering my orchid?
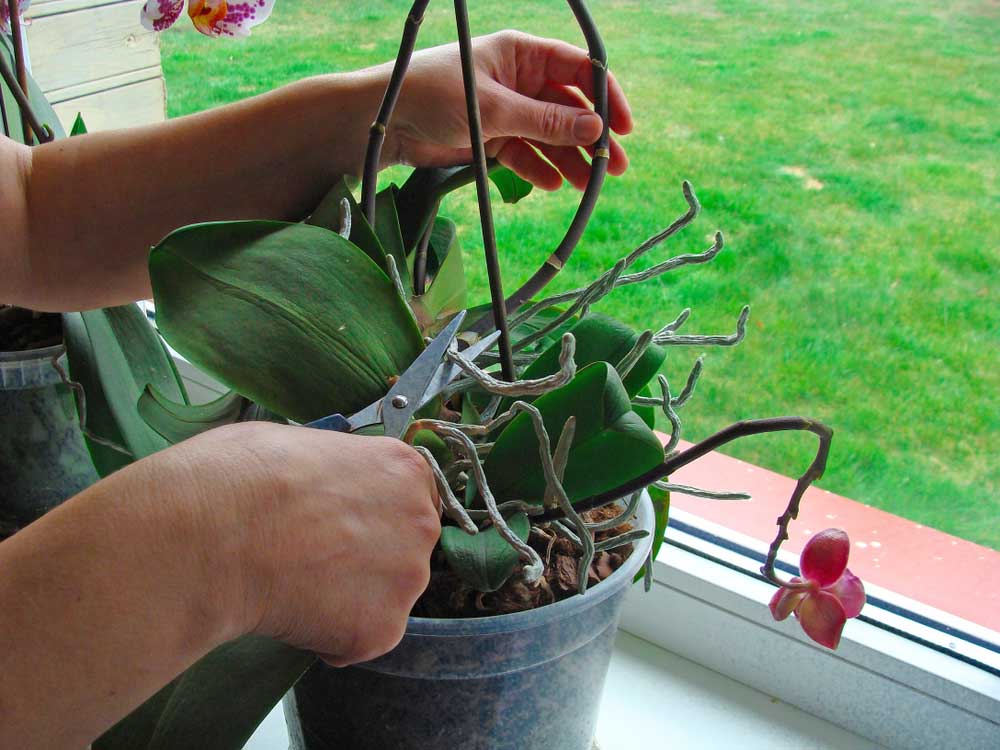
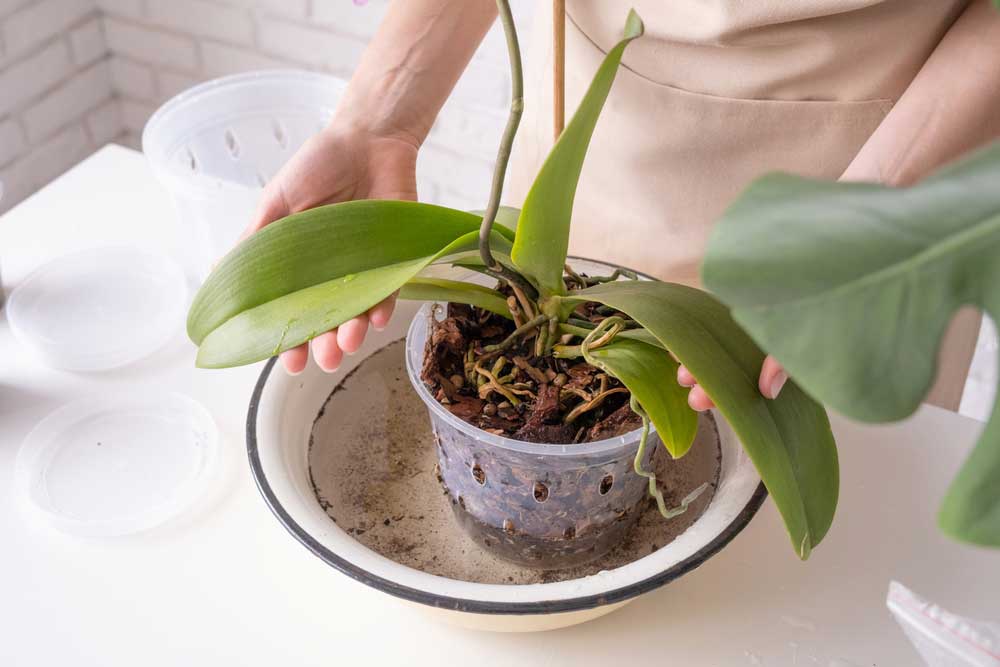
Stop watering immediately and check the roots. Remove the plant from its pot, trim away any brown or mushy roots with sterile scissors, and repot in fresh orchid bark. Resume watering only when the new medium approaches dryness.
Q: Can I use fertilizer water for the soak and drain method?
Yes, but use a very dilute orchid fertilizer (about 1/4 strength) and alternate with plain water. Never fertilize dry orchids – always water first, then apply dilute fertilizer if desired.
Q: Why do my orchid’s leaves wrinkle even though I water regularly?
Wrinkled leaves often indicate root problems rather than insufficient watering. Check the roots for rot, which prevents water uptake even when the medium is moist. Dehydration can also occur if water quality is poor or if the plant is root-bound.
Q: Should I water orchid blooms differently than non-blooming plants?
Blooming orchids have the same watering needs as non-blooming ones. However, be extra careful to avoid getting water on the flowers, as this can cause spotting or premature flower drop.