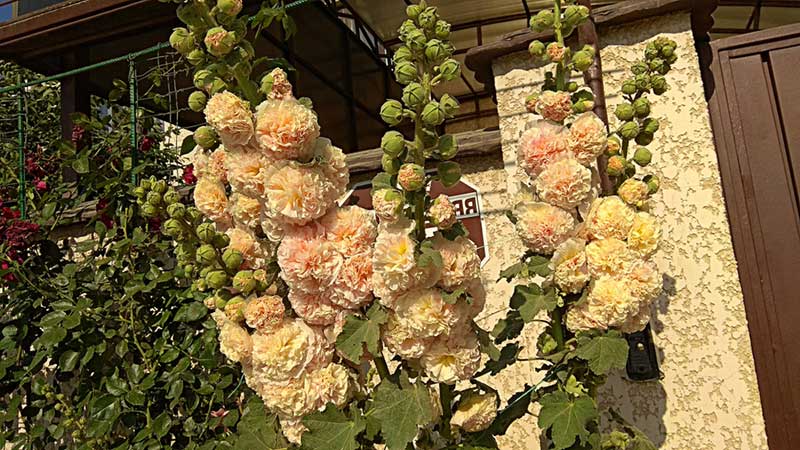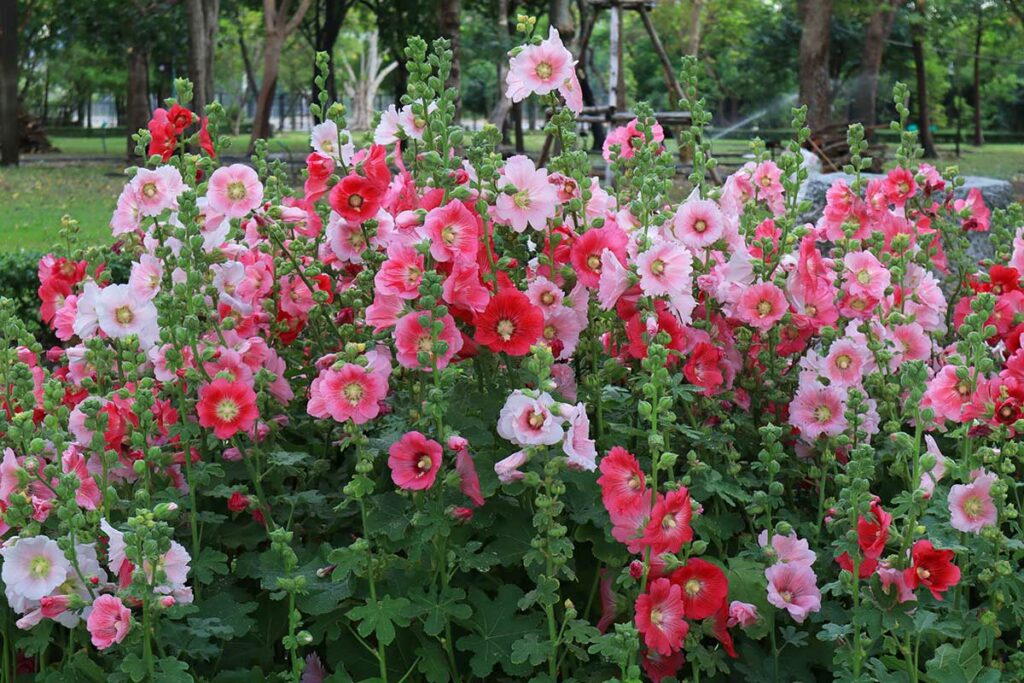
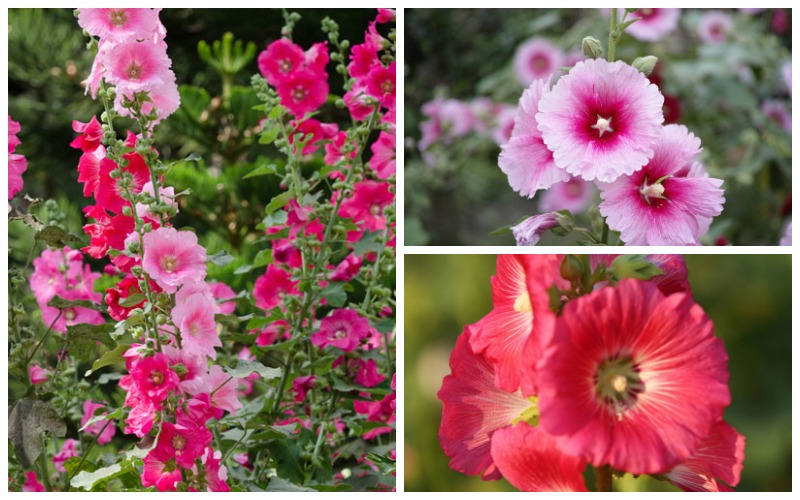
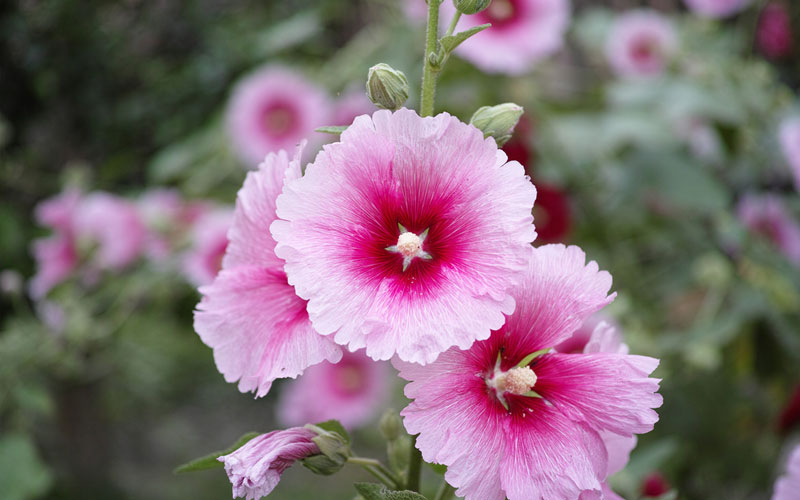
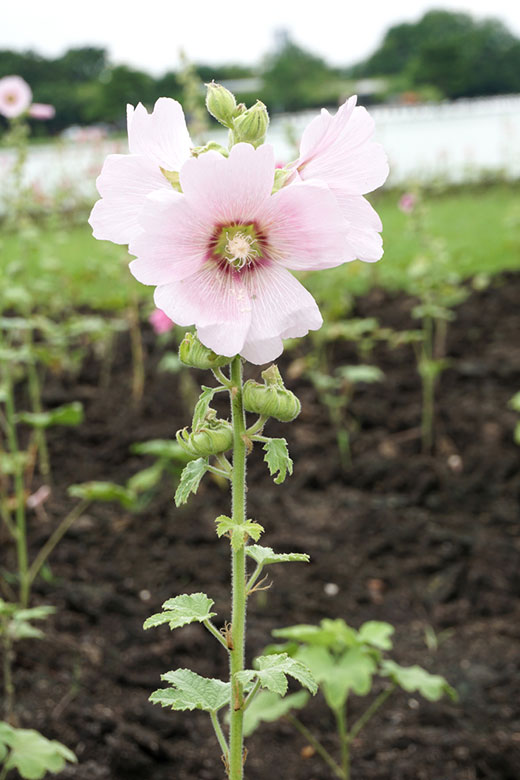
Hollyhocks originated in Asia and the area around the Eastern Mediterranean Sea. These stately beauties belong to the Mallow (Malvaceae) family, which includes an unbelievable 1500 different species out of which 27 genera are found throughout North America. Members of this plant family have a distinctive look, so if you think that Hollyhocks remind you of Hibiscus (like I do), you’re not out of your mind.
Table of Contents
Hollyhocks are generally hardy between USDA hardiness zones 3 and 8. Let me qualify what I mean when I state they’re “generally hardy” in that hardiness range. Zone 3 encompasses an area at the far northern part of the United States. Winters are pretty extreme up there, and it’s hard to predict how cold temperatures will get in different regions of the country.
That being said, I advise anyone who wants to plant hollyhocks in a place where winters are severe, to plant them in a location where they will have protection from polar vortexes. I would also cover the ground with a thick layer of mulch. The alternative is to plant them in containers, which is probably a better option if you live in a zone where permafrost is the norm. That means that you live in an area where winters are so long that the ground doesn’t thaw.
At the opposite end of the spectrum, people who live in zone 8 often face the opposite problem. We experience long stretches throughout the summer where temperatures hover near the century mark. Trust me, in places like the middle of Texas (where I live,) we zip through spring as though it hardly exists and before we realize it, the air conditioner is running, and it won’t go off until the end of October — maybe. The point is, in areas where it’s rare for daytime temperatures to drop below 90, the climate isn’t ideal for anything – including hollyhocks.
It is important to understand that it’s not enough to read a seed package and decide to grow hollyhocks because the package says they’re hardy between USDA Hardiness Zones 2 and 8. Be prepared to protect your plants from any extreme and from severe rainstorms and hurricanes.
How to Grow Hollyhocks
How to Plant Hollyhock Seeds Indoors
If you want to jump-start the growing process, or you want to make sure that you’ve got substantial seedlings to transplant in places where the growing season is short, you ought to start your seeds indoors. You don’t have to abide by the calendar or outside temperatures to do this. The easiest and most efficient way to start seeds indoors is a reusable plastic seed starting kit. They are designed to hold peat pots which are ideal containers in which to sow seeds. You can plant the whole peat pot in the ground. Alternatively, you can use peat pellets that are ideal when you’re planting one seed per pellet.
For peat pots, make sure you have a good planting medium with added Perlite, Vermiculite, and peat moss. Fill each peat pot with soil, leaving an inch of space at the top of the pot. After filling the pots, water them thoroughly. When you’re planting seeds in pots, it’s always better to dampen the soil first. If the soil is dry, the seeds may wash away without you ever realizing it.
Plant one seed in each peat pellet. Cover the seed with a bit of soil — and do the same for the peat pots you may have planted. Cover your seed starting system with the plastic lid. Cut slits in the top of the clear plastic top to let air in. Cover the plastic with something lightweight that will keep the light out. Place the newly planted seeds in a warm location where they won’t be disturbed.
After about a week, start looking for signs of germination. You should see sprouts emerge within ten days to two weeks. Once they germinate, you’ll no longer need to keep the dark cover over the seed starting tray. Now you can move your seedlings to a bright location where you can keep the bottom of the seed starting trays warm.
If you sow your seeds indoors, you’ll be able to plant hardy seedlings in pots or in the ground at the appropriate time for your USDA Hardiness Zone. Before you transplant seedlings into the ground or move the containers you want to grow your hollyhocks in outside, take the seed starting trays outside so they can harden off for a week or two. The gardening term “hardening off” refers to the practice of letting seedlings or starter plants adjust to being outside before you transplant them into the ground or take container-grown plants outside
Everything You Need to Know About Planting Hollyhock Seeds in the Ground
If you have a longer growing season, you may want to plant your hollyhock seeds in the ground. The practice of planting seeds in the ground after the last frost date is known as “direct sowing.” Before you hastily plant the seeds in the ground, you need to plan ahead.
Don’t get discouraged if your hollyhocks don’t bloom the summer after you plant them – regardless of whether you plant them in spring or summer. The typical life cycle of these showy flowers is such that they spend the first year developing roots and producing stems and leaf growth.
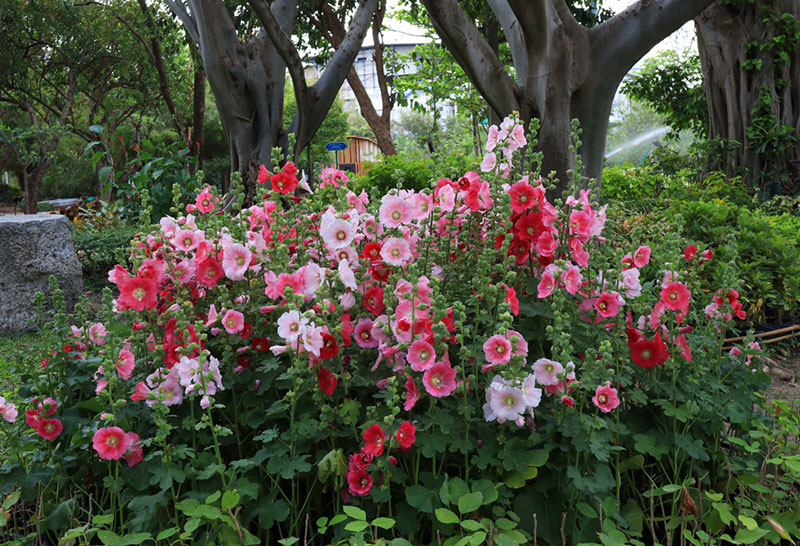
Figure Out Where to Plant Your Hollyhocks
Take the time to survey your property to find places that will give your hollyhocks the sun they need to thrive. If you live in a hardiness zone where summers are characterized by sweltering heat, you’ll want to find a spot that protects your hollyhocks from the hottest afternoon sun, while still giving them at least a half a day of direct sun.
If you live in a place where gale force winds are the norm during winter, spring or summer, you need to find a place where there is a barrier that can protect the thick stalks from all destructive weather elements. If you’re not going to plant them up against a wall or fence, you must find a place that has enough space for the supports you’ll need for the tallest hollyhock varieties.
How to Prepare the Ground for Planting
Hollyhocks are pretty adaptable to different types of soil – with a few exceptions. You must plant your seeds or bare roots in the ground that have excellent drainage. The ideal soil pH for hollyhocks ranges from a pH of 6, which is slightly acidic, and a pH of 8, which is more alkaline. If you don’t know what your soil pH is, contact your county extension service to find out whether they have a soil testing service. You can also buy an inexpensive soil testing kit from seed companies or home improvement stores.
The results of a soil test will show you what you need to do to amend your soil with organic materials that will feed your hollyhocks throughout their growth cycle. If you are planting your hollyhocks in spring, which is the time of year when fertilizer is most helpful, you can till a lot of organic manure or compost into the soil as you prepare it for planting, whether you’re sowing seeds or use bare roots you purchased.
It’s always a good idea to wait a week before planting your seeds or rootstock after you till and amend your planting area. The purpose of waiting is to let soil amendments settle into the ground and to make sure that the soil consistency is ideal for planting.
Planting Your Hollyhock Seeds and Bare Roots
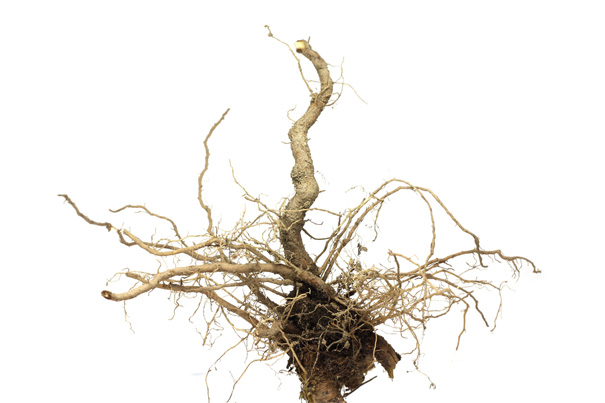
Plant spacing is critical – especially when you’re planting bare roots. Hollyhocks develop taproots that are long and thick. Once your plants establish roots after planting, their massive taproots make it difficult, if not impossible to dig them up for transplantation. You will be able to thin your seedlings as soon as they germinate to make sure that you have enough distance between every young plant. When you start to thin the seedlings, create a space of 12- to 18-inches between the plantlets. If you’re growing hollyhocks in rows, be sure that you leave a 3-foot distance between the rows.
- When planting hollyhock seeds, don’t bother to dig a hole or trench. You will lay the seeds ¼ inch below the surface.
- As soon as you receive hollyhock roots, remove them from the box and gently removing the protective material surrounding the roots. Inspect them to make sure that the fleshy roots weren’t damaged during transit. If the roots seem overly dry, soak them in a container of water until they perk up, making sure you check on them periodically. You want to revive them without allowing them to soften.
- For rootstock or bare roots, prepare a planting area by digging holes for each bare root that are wider than the roots and no more than two inches deep.
How to Grow Hollyhocks in Containers
If you’d like to grow hollyhocks in containers, I urge you to search for dwarf cultivars such as ‘Queeny Purple’ because it won’t grow taller than two or three feet. You’ll need a gigantic container that is deep enough to accommodate large hollyhock taproots and wide enough to allow roots to spread out, which they do during the first growing year. Look for containers that are at least 16-inches deep with a diameter of two feet. Try to visualize a whiskey barrel, and that will help you in your quest to find a suitable planter.
Drainage is essential to hollyhocks, so the ideal growing medium is one you make. You must have equal parts of peat moss, perlite, and good old-fashioned garden loam. All soil consists of particles of clay, sand and silt. The ideal garden loam is the perfect balance of all three types of particles. This planting mix will let soil nutrients and fertilizer reach your hollyhocks will allow the air to circulate around the roots.
Once you’ve planted your hollyhocks in a container, find a sunny location in your yard or on a deck or patio. Be prepared to move the planter to a shadier site during hot and dry spells. You’ll also want to find a place where they’ll be protected from high winds or severe storms.
Everything You Need to Know About Hollyhock Care and Maintenance
Container grown hollyhocks will require much more maintenance than the hollyhocks you plant in the ground. The soil in pots dries out faster, and some of the soil nutrients wash away when water runs out of the bottom of the planter. Use your finger to help you know when you need to water the plants, using a one-inch measurement as the benchmark. If you feel dry soil at more than an inch from the surface of the ground, you will need to water your plant. Direct the water towards the ground and try to avoid getting the leaves wet. In hot weather, you may need to water a container every day.
- Fertilize hollyhocks that you grow in planters on a regular 7-to-14 day schedule. Use a bloom boosting fertilizer with a breakdown of 15-30-15. Home improvement stores that have a garden center will have a variety of fertilizers from which you can choose. Look for a product that advertises itself as a bloom booster, or that has a higher phosphorus concentration. That’s the mineral that encourages flowering.
- For the hollyhocks you plant in the ground, you want to allow the water to go as deep into the ground as possible. Avoid using sprinklers or any watering device that will saturate the leaves of your plants. Deep root watering via a soaker hose or above ground irrigation system is more efficient and less wasteful. Allow the water to soak into the roots for an hour and a half or two, especially if you’re watering an entire perennial bed. Plan to water your hollyhocks more often on scorching hot days or during extended dry periods.
- Water early in the morning so the sun can dry wet stems or leaves. You can cover the ground around the hollyhocks with a layer of biodegradable mulch that will decompose and nourish the soil. Mulch is also useful for inhibiting weed growth (so you don’t have to spend as much time weeding,) and moderating soil temperatures. Best of all, that layer of organic goodness protects the surface of the ground from the drying effects of the hot summer sun while helping the deeper soil stay moist for longer.
How to Get Your Hollyhocks Ready for Winter
Because of the vast range of hardiness zones that hollyhocks grow in, there is no reason to dig them up at the end of their yearly growing cycle. What you will want to do, however, is cut the stalks off of each plant at the soil line. Discard the stalks after harvesting the seeds, if you let your hollyhocks go to seed instead of deadheading spent flowers. Cover the bed with a thick layer of mulch to insulate the ground where the dormant roots will rest all winter.
What You Need to Know About Harvesting Seeds from Your Hollyhocks
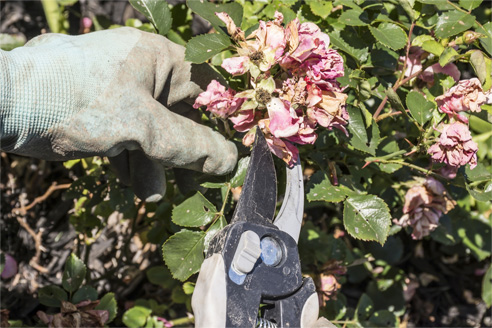
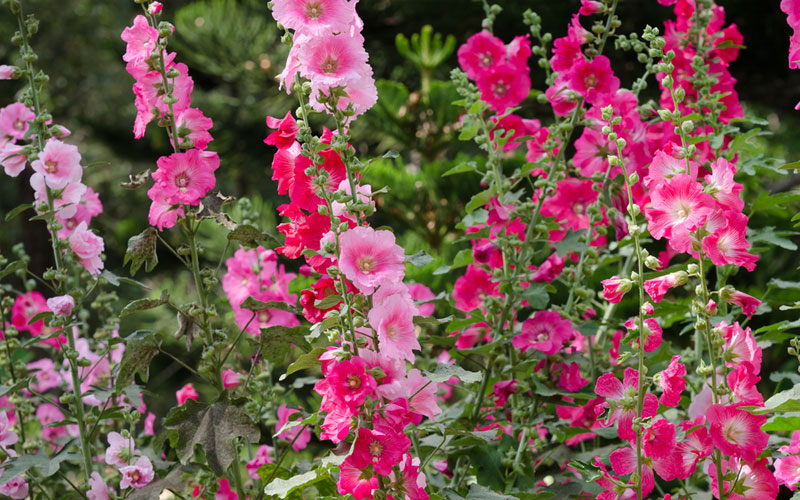
Hollyhocks flower from the bottom up. To encourage flower production, remove flowers that wilt after blooming. If you want to harvest seeds with the intention of growing the same variety of hollyhocks you recently planted, stick to one cultivar. Since hollyhocks produce seeds through cross-pollination, you run the risk of harvesting seeds of crossbred varieties if you plant different types of hollyhocks.
If your hollyhocks are planted in a place where the bottom portion of the stalks is concealed, you may want to leave the spent flowers at the bottom so that seeds will develop there.
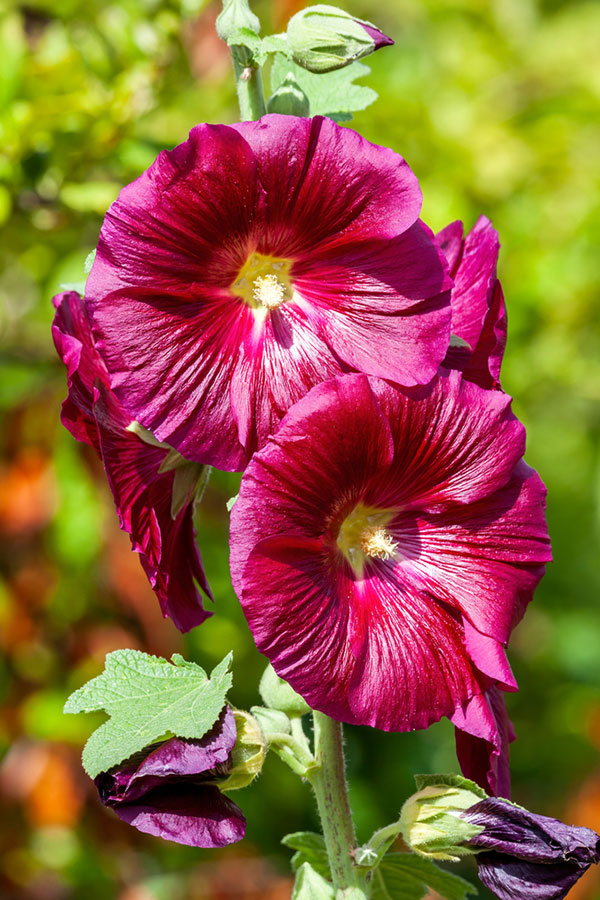
As with all flowering plants that produce seeds after pollination, hollyhocks will develop seed pods that expand as the seeds mature and ripen. Once the seeds are mature enough to harvest, the pod will turn brown because it dries out. The seed pod will come off of the plant stem very quickly, so use that as your gauge in judging whether the seeds are ready to harvest.
- Do not collect seeds from diseased plants, especially if the disease is one that may remain dormant in the plant over the winter. From my standpoint, as much as I love to harvest seeds from everything I grow, I don’t like to take chances when it comes to the possibility that diseases can contaminate developing seeds.
- If you want to harvest seeds that are true to the parent plant, do not plant different cultivars or species at the same time. Unless you have a huge piece of property on which you can plant different varieties at least a quarter of a mile apart, the inevitable reality of cross-pollination is that you’d be creating a situation where you could easily wind up harvesting hybridized seeds. If your intent is to collect seeds, and you want to get seeds that have the DNA of the cultivar, species or variety you planted, stick to that type. – at least for the growing season.
Hollyhock Fungal Diseases
The assertion that hollyhocks don’t require a lot of maintenance is reasonably accurate. As long as they grow in an environment that gives them the necessary sunlight, moisture, room to grow, and protection from the sizzling sun or other weather extremes, you shouldn’t encounter any problems.
Since you can’t control the weather, including the day and nighttime temperatures, the amount and frequency of rain or lack thereof, you have to deal with the meteorological hand you’re dealt, figuratively speaking.
Three major fungal diseases attack hollyhocks. Those diseases are Hollyhock Rust, Powdery Mildew, and Anthracnose. Excessive moisture — either from faulty watering practices, or torrential rainstorms that occur regularly, create an environment that is conducive to the development of many fungal diseases, including the three I’m about to discuss.
Hollyhock Rust
Rust is one of the most extensive fungal diseases that affect plants. Out of roughly 5,000 discovered species of the disease, Hollyhock Rust is caused by the Puccinia malvacearum fungus. It is easy to recognize because it begins with little orange-brown colored flecks that cover the underside of plant leaves. As the disease spreads, which it will do quickly in moist, humid and hot conditions, the flecks get larger and turn into pustules. The tops of leaves will start to develop yellow spots.
It’s important to know that the disease begins on the lower leaves of plants it infects. Those leaves are closer to the soil surface and are more likely to get soaked. Over the course of the summer, the disease will spread to the upper leaves. In severe cases of the disease, the yellow spots will spread, covering the entire top surface of plant leaves. The yellow leaves will start to shrivel up before they fall off.
If the disease isn’t treated, the leaves will dry up, turn brown and die. Pustules on the undersides of leaves will turn from the orangish-brown into a yellowish green before they turn into black areas.
How Hollyhock Rust Spreads
Fungal spores spread quickly and easily through the wind and through the splashing rain. It also spreads through splashing water, which is inevitable when plants aren’t watered with soaker hoses or underground irrigation systems.
The disease progresses throughout the summer, traveling up the plant stalks, causing the thick stems to turn brown before they wilt, dry up and fall off the plant altogether.
Infected plant parts can spread the disease to weeds and nearby plants. This is why it is so important to leave enough space between hollyhocks when planting them. It’s also important to keep the flower bed free from weeds. If the disease has spread to one plant, it’s very likely that more plants will be infected, even if they don’t show symptoms right away. Since Hollyhock Rust spores can survive over the winter, you should not harvest seeds from diseased plants.
The most effective ways to manage the disease are by combining prudent watering practices and using fungicidal treatments. Look for a Copper Fungicide (Liquid Copper,) Safer Brand Fungicide or 3-in-1 spray, or Garden Safe 3-in-1 spray, both of which contain sulfur as a fungicide. These products are environmentally friendly, safe for wildlife, and for children and pets.
Powdery Mildew
Powdery mildew is easy to recognize because it coats plants with a white powder-like substance. Other fungal species that are closely related to powdery mildew often cause this fungus to develop. It is a very common plant fungus that is found all over the United States.
Unlike Hollyhock Rust, which thrives in excessive moisture, Powdery Mildew develops in places where the hot, humid air is accompanied by low soil moisture. I realize that that description makes it sound like powdery mildew could develop in areas that are plagued by drought. Humid air and low soil moisture aren’t contradictory. Low soil moisture is either the result of no rain or lack of supplemental irrigation. Hot, humid air is common all over the South where moist air from the Gulf of Mexico infiltrates areas that are hundreds of miles away from the coast.
Powdery mildew doesn’t typically infect hollyhocks until later in the growing season. It doesn’t attack mature foliage; it targets newly sprouted leaves. The white powdery stuff isn’t an early sign of the disease. It starts on young leaves, covering them with raised blemishes that are transparent. As the scars cover more of each leaf surface, they begin to curl, so the underside of the leaves are visible.
As the infection spreads, the white powdery substance starts to spread to more new leaf growth, and to developing buds. The more severe the leaf damage is, the greater the overall plant defoliation.
Since the disease-causing fungus spores spend the winter hiding in leaf buds and other plant debris, it is essential that no debris be left in the flower bed or anywhere near where hollyhocks grew. The disease also spreads through wind and water, and through insects that pick up the spores from contact, they have with infected plants.
Prevention
- Make sure that plants have plenty of airflow – in the soil and in the growing bed.
- Stake tall plants to prevent them from leaning towards other plants.
- Clean your gardening tools by washing them in a solution of one part bleach to four parts of water.
- Discard diseased leaves that you find on the ground or remove them from the plant.
- Always water plants early in the morning so that the ground can dry throughout the day .
- Keep water away from the leaves unless you’re spraying them in the middle of the morning to interrupt the daily spore release.
Once your hollyhocks are infected with powdery mildew, you’ll want to start a weekly protocol of spraying plants with copper sulfur-based fungicides.
Anthracnose
Anthracnose is caused by fungi that belong to the genus Colletotrichum. The genus belongs to a group of common plant pathogens that are responsible for many diseases that infect many plant species.
The disease is characterized by water-soaked dark lesions that appear on all parts of hollyhocks. It is a fast-spreading disease. The surface of lesions develops a pink colored mass of spores that have a gelatinous consistency. The disease can transform a beautiful hollyhock into a pile of rotted plant debris within days after infecting a plant.
Anthracnose survives through winters and the fungal spores hide in soil, garden debris, and seeds. It thrives in moist conditions that also allow it to germinate. The cool weather combined with moisture allow the fungus to develop and spread, as do contaminated garden tools, the wind, rain, and insects.
Treating and Preventing Anthracnose-Infected Hollyhocks
- Look for seeds that come from the western part of the United States because the disease is more prevalent throughout the Eastern U.S.
- Never save seeds from plants that were infected with this fungus.
- Avoid working in wet gardens.
- Use a bleach and water solution (one part bleach to four parts water,) to clean and disinfect garden tools.
- Never throw any part of a diseased plant in your compost pile.
- Clean up flower beds where infected plants were planted. Do not leave diseased plants in the ground.
- Prevent the disease before it starts. Develop a weekly protocol for spraying hollyhocks with liquid copper and dusting them with sulfur powder.
- Start the treatment routine in early spring – as soon as the hollyhock stalks sprout.
- Apply treatment early in the morning.
- Don’t apply copper or sulfur treatments in hot weather.
- Treat seeds and bare roots with fungicides as a precautionary measure.
Use a bio-fungicide called Serenade Garden. It’s made of a patent-holding strain of Bacillis subtillis. It is certified organic and non-toxic.
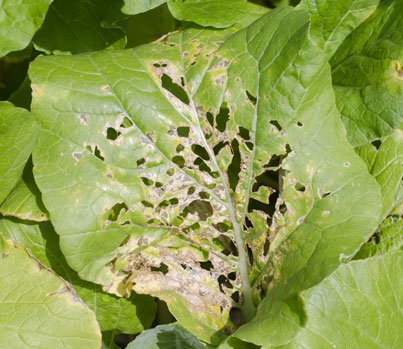
Hollyhock Insect and Pest Problems
There are four types of bugs that feed on hollyhock plants. The degree to which they cause damage depends on many environmental and cultural variables. The insects and pests I’m referring to include spider mites, thrips, Japanese Beetles, and sawflies.
Spider Mites
Spider mites are among the most common plant nuisances there are. They cause problems on all sorts of indoor and outdoor plants, and on plants that grow in greenhouses. They are not true insects because they belong to the arachnid family, the family to which spiders belong. Spider mites are related to spiders.
Adult spider mites are so tiny that they’re hard to see — at least until colonies of these period-size sucking beasts infest the bottom of leaves all over hollyhocks. By the time tiny white dots cover leaves creating a stippling effect, their damage is significant.
After mating, female spider mites look for places on which to lay as many as 300 eggs in a single mating cycle. Because they reproduce so prolifically, yearly populations consist of many generations of spider mites whose lifecycles overlap.
Spider mites thrive in hot and dry conditions, but they also attack plants that suffer from water-related stress.
Thrips
There are over 6,000 known thrip species throughout the world, all of which are sucking insects. Thrips don’t confine their sucking and sap-feeding to plant leaves. They are relentless in their quest to suck the life out of every plant part, including the flowers.
Adult thrips are so small, they are almost indistinguishable from immature insects without the help of a magnifying glass. At a jaw-dropping size of less than 1/25 of an inch, these black or straw-colored minuscule four-winged insects might easily be mistaken for a tiny piece of thread.
Despite their size, these active pests work in large groups, the result of which is major damage in very little time . Evidence of a thrip infestation begins as leaves develop splotches. Eventually, the leaves show signs of chlorosis, die and fall off the plant. Thrips hibernate all winter in the soil. They also hide in plant debris and leaves.
Since thrips reproduce without mating, a new generation of females emerges every spring, looking for places to lay their eggs. After cutting slits in plant stems, they lay some eggs in the slits. Each female can produce as many as 80 eggs, the rest of which she deposits in hollyhock flowers or on the leaves.
Sawflies
The sawfly, or Caliroa cerasi is also known as the cherry slug or the pear slug in all likelihood, because of their fondness of these trees. Unlike the slugs that resemble the colorless gelatinous pest that lives inside snail shells, sawflies are darker. Young sawfly larvae are greenish-black and measure no more than ½ inch in length. Their bodies lighten with age. Mature Sawfly larvae look like caterpillars. Mature adult sawflies become non-stinging wasps that are black and yellow, and measure about ⅕ of an inch in length .
Sawflies hibernate in soil over the winter where they rest in cocoons. Mature larvae emerge in spring when trees, shrubs and flowering plants have all of their leaves. These defoliating predators then lay eggs on leaves.
Controlling and Preventing Defoliating Damage from Sawflies, Spider Mites, and Thrips
- Fill your yard or garden with beneficial insect and pest-eating bugs such as predatory mites, lacewings, and ladybugs. These essential bugs will eat the spider mites that may destroy your hollyhocks. Release these bugs at the earliest sign of spider mite presence.
- Spray plants with blasts of water, pyrethrin-containing insecticides, Neem oil, insecticidal soaps or similar products. When using any type of liquid treatment, confine your treatment to morning hours so the leaves dry quickly. Avoid using Neem oil or other products in hot weather.
- Since sawfly larvae resemble slugs, you can spread diatomaceous earth on plants in the hope of preventing eggs from hatching or killing the slugs before they can lay eggs.
Japanese Beetles
Unlike sawflies, spider mites, and thrips, all of whom are considered defoliating insects, Japanese beetles are skeletonizing menaces. In preparation for winter hibernation, these destructive hollyhock beasts tunnel their way through the soil until they find a satisfactory place at 10-inches below the soil surface where nearly mature larvae will hibernate all winter.
When spring arrives, they tunnel their way up toward the surface, pupating as they go. By the time they emerge from their long winter sleep, they are ravenous mature Japanese beetles who engage in a six-week long non-stop feeding frenzy as females deposit eggs in the grass. Japanese beetle larvae eat grass roots, but the mature beetles feed on the leaves of plants they like – including hollyhocks.
Controlling Japanese Beetles and Preventing Damage
- Create an area to attract insect-eating birds. By attracting these hungry birds and providing them with a tasty feast, you can let the birds help you get rid of some of the Japanese beetles.
- Fill a bucket full of soapy water. Walk through your yard to examine every flower, tree or shrub you can look at that is known to host Japanese beetles. Pick the bugs or grubs off one by one and toss them in the soapy water. As gross as this sounds, it’s a lot better than using expensive and potentially toxic pesticides.
- Japanese beetles prey on other flowering plants, and on grass. You can’t prevent a massive infestation unless you deal with every potential target plant. Sprinkle Diatomaceous Earth (DE) on grass and other susceptible plants.
Conclusion
I hope I’ve given you a thorough guide that introduces you to hollyhocks while providing you with some useful information to help you come up with a plan to include these beautiful, showy, colorful and fun flowers in your flower beds or elsewhere on your property.
- Plant hollyhocks in a location where they’ll get plenty of sun. If you live in a place where scorching heat is the norm, find a planting site where you can protect them from the hottest sun.
- Plant bare roots or seeds far enough apart to let air circulate and to prevent water from accumulating. If you’re planting them in a bed with other perennials, allow 18-inches. Plant rows three feet apart.
- Water hollyhocks with soaker hoses. Avoid overhead watering so the leaves don’t get wet. Don’t overwater or allow standing water to soak the roots.
- Test your soil to find out what you need to do to amend it. Hollyhocks need soil with excellent drainage.
- Cover the ground around your hollyhocks with mulch to inhibit weed growth and to keep the soil cool – especially in hotter growing zones. You can use manure as a mulch because hollyhocks love manure.
- Make sure you have a fence, wall or stakes that you stick deep in the ground to support tall hollyhock cultivars. Protect them from wind, hail, heavy rain, and of course, tornadoes and hurricanes.
The rewards you’ll reap from growing hollyhocks will far exceed the effort you put into growing them. The most important things to remember are to give them enough sun and air, and to be mindful of the amount of water they’re getting, especially when the powers of the atmosphere are in control.
Related Articles