As a gardening enthusiast, I’m often asked about the best time to divide daylilies. Daylilies are a popular perennial flower, known for their vibrant colors and hardiness. Dividing daylilies is an important task that helps keep them healthy and thriving, but timing is key.
Dividing daylilies can be done at any time of the year, but there are certain times when it’s best to do so. In this article, I’ll share some expert tips on the best time to divide daylilies, so you can ensure your plants stay healthy and beautiful year after year. Whether you’re a seasoned gardener or just starting out, these tips will help you get the most out of your daylilies.
Understanding Daylilies
Daylily Growth Cycle
As a daylily enthusiast, I have learned that understanding the growth cycle of daylilies is crucial to their care. Daylilies are perennial plants that grow from a crown, which is a cluster of roots and leaves. In the spring, daylilies begin to grow new leaves from the crown. As the weather warms up, the daylilies produce flower buds, which bloom in the summer. After the flowers are spent, the daylilies continue to grow leaves and store energy in the crown for the next year’s growth cycle.
Signs It’s Time to Divide
Dividing daylilies is an important part of their care, as it promotes healthy growth and prevents overcrowding. When daylilies become crowded, they may produce fewer flowers and become more susceptible to diseases. As a general rule, daylilies should be divided every 3-5 years. However, there are some signs that indicate it’s time to divide your daylilies sooner. These signs include:
- The center of the daylily clump has died out
- The daylilies are producing fewer flowers than usual
- The daylilies are not growing as vigorously as they used to
- The daylilies are becoming too large for their space
If you notice any of these signs, it’s time to divide your daylilies. Dividing daylilies is a simple process that involves digging up the clump and separating it into smaller sections. Each section should have at least one healthy crown and several roots. After dividing, replant the sections in well-draining soil and water thoroughly.
Remember, understanding the growth cycle of daylilies and knowing when to divide them is crucial to their care. By following these tips, you can ensure that your daylilies will thrive and produce beautiful blooms for years to come.
Optimal Timing for Division
Best Seasons for Dividing
As an experienced gardener, I have found that the best time to divide daylilies is during the early spring or fall. Dividing daylilies in the spring allows the plants to establish their roots before the heat of summer, while dividing them in the fall allows the plants to focus on root growth instead of producing blooms.
Weather and Soil Conditions
It is important to take into consideration the weather and soil conditions before dividing daylilies. Dividing daylilies during a dry spell can cause stress to the plants, so it is best to wait until after a good rain. Additionally, it is important to ensure that the soil is moist but not waterlogged, as this can also cause stress to the plants.
When dividing daylilies, it is important to ensure that each division has at least one healthy fan of leaves and a portion of the root system. It is also recommended to cut back the foliage by about two-thirds to reduce stress on the plant and promote new growth. By following these tips, you can ensure that your daylilies will thrive after division.
Step-by-Step Division Process
Preparing the Daylilies
Before starting the division process, I make sure to water the daylilies thoroughly a day before. This helps to keep the roots hydrated and makes it easier to separate the clumps. I also prepare all the necessary tools such as a sharp knife, garden fork, and gloves.
Dividing the Clump
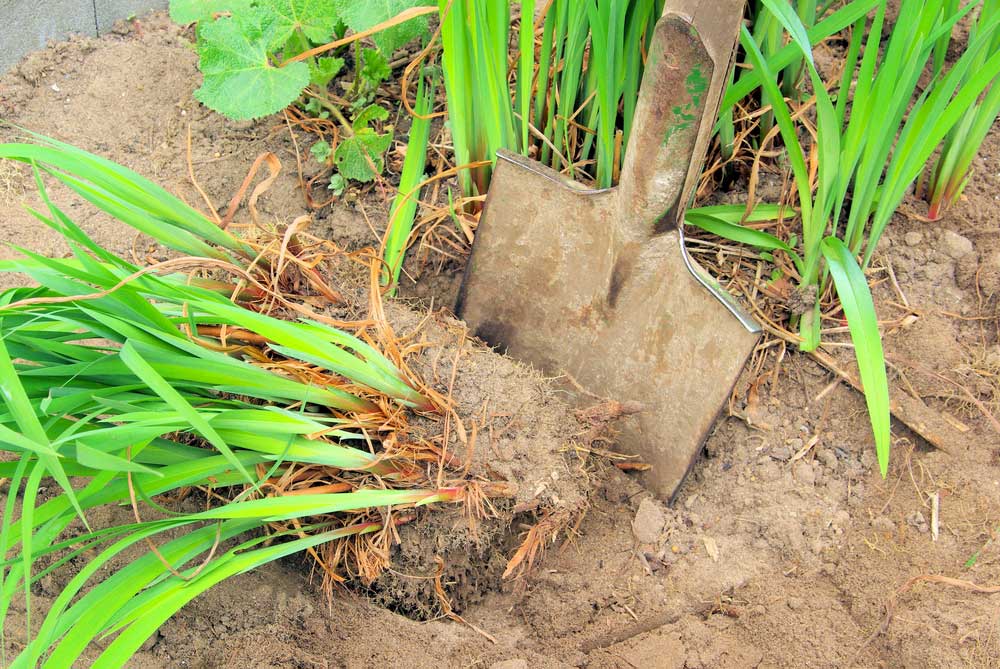
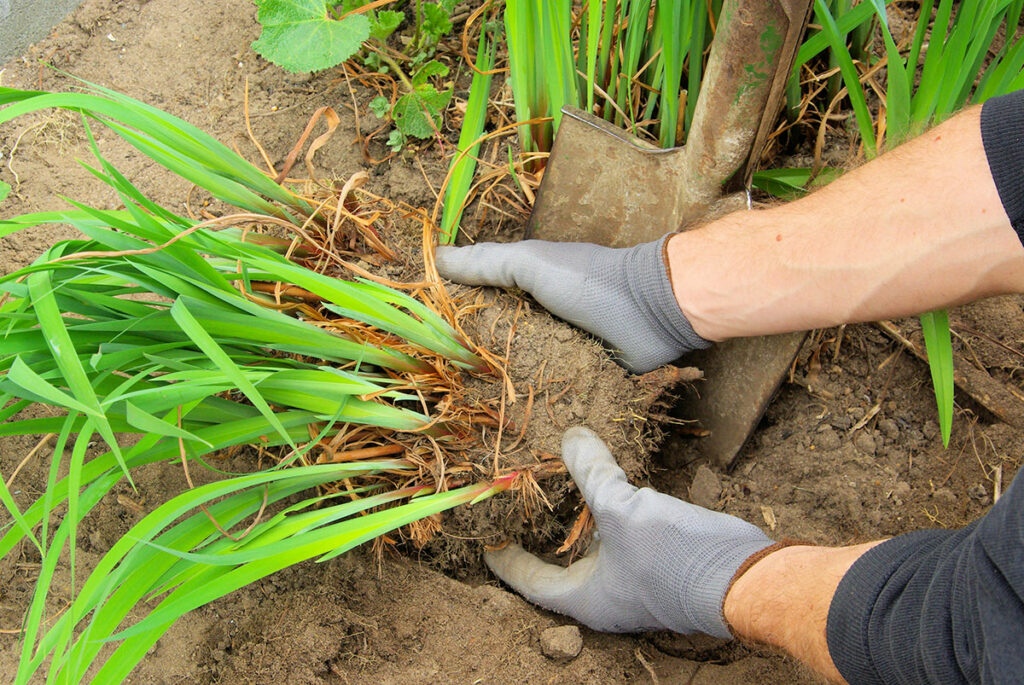
To divide the clump, I gently lift the daylily from the ground using a garden fork. I then use a sharp knife to cut the clump into smaller sections, making sure each section has at least three healthy fans and a good root system. It’s important to avoid cutting through the crown of the plant, as this can damage the growing point.
Once I have divided the clump, I trim the roots by about a third to reduce the stress on the plant. I also remove any dead or damaged leaves and stems.
Planting the Divisions
After dividing the daylilies, I prepare the planting area by adding compost or well-rotted manure to the soil. I then dig a hole for each division, making sure it’s deep enough to accommodate the roots without bending them.
I place the division in the hole and backfill with soil, making sure to firm it down gently to remove any air pockets. Finally, I water the newly planted daylilies thoroughly and add a layer of mulch to help retain moisture.
By following these simple steps, I can successfully divide my daylilies and ensure that they continue to thrive in my garden.
Aftercare for Divided Daylilies
Watering
Once you have divided your daylilies, it is important to water them thoroughly. I like to water my daylilies immediately after dividing them to help settle the soil around the roots. After that, I water them every few days for the first few weeks to ensure they are getting enough moisture.
It’s important not to overwater your daylilies, as this can lead to root rot. Make sure the soil is moist but not waterlogged. If you are unsure whether your daylilies need water, stick your finger into the soil. If it feels dry to the touch, it’s time to water.
Fertilizing
Daylilies are not heavy feeders, but they do benefit from a little fertilizer. I like to use a balanced fertilizer, such as a 10-10-10 or 20-20-20, in the spring and again in the summer.
When applying fertilizer, be sure to follow the instructions on the package. Overfertilizing can lead to burned foliage and reduced flowering. I also like to mulch around my daylilies to help retain moisture and add nutrients to the soil over time.
By following these simple aftercare tips, you can help ensure that your divided daylilies thrive and continue to provide beautiful blooms year after year.

