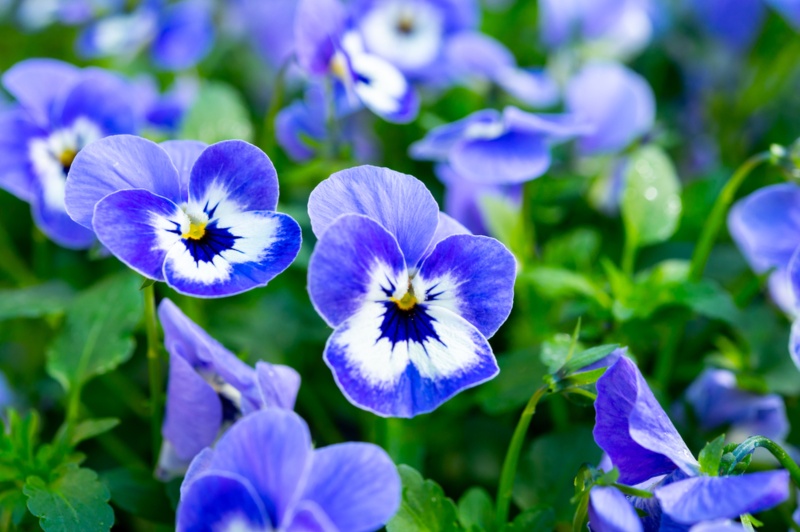
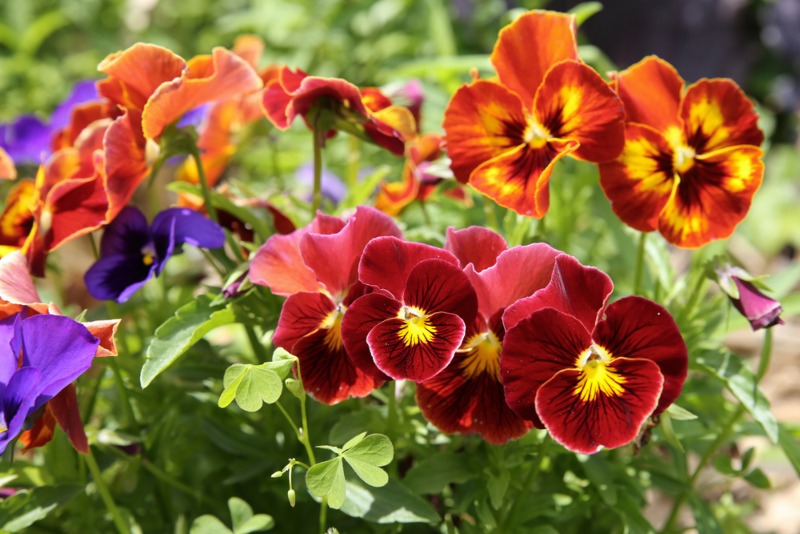
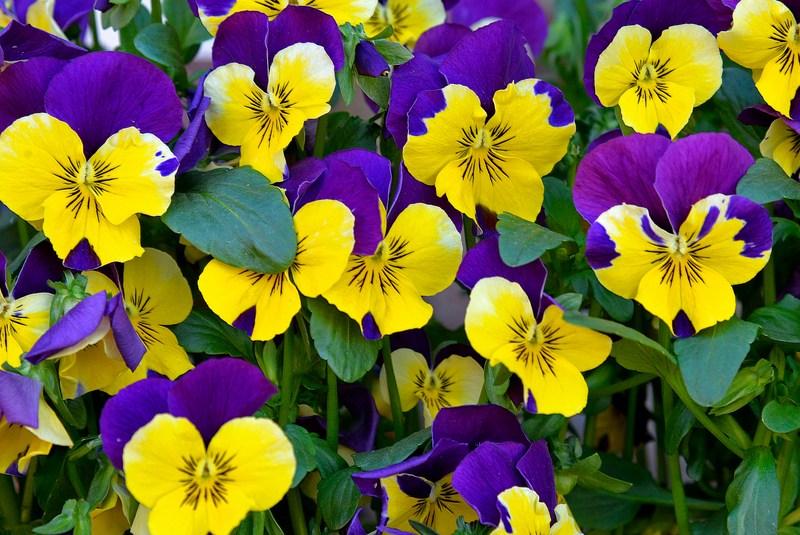
The viola is a common garden plant that grows in a wide variety of bright colors. There are roughly 500 species of violas, many of which are native to North America, Australia, and Asia. Despite being cool-season plants, they do require ample sunlight. With the proper growing conditions, violas can reach 6 to 10 inches in height. Unbeknownst to most growers, these plants are also edible!
For optimal growth and year-round enjoyment, be mindful of temperatures, humidity, and sunlight. Violas do not require around-the-clock care but can benefit from daily monitoring. With proper care, full germination occurs within 30 to 60 days.
| Botanical Name: | viola spp. |
| Common Name(s): | pansies, sweet violet |
| Plant Type: | Annuals and short-lived perennials |
| Mature Size: | 4-10 inches in height |
| Sun Exposure: | Full sun & Shade |
| Water Needs: | Water regularly but only when the soil is completely dry |
| Soil Type: | Moist and well-draining soil |
| Soil pH: | 5.4-6.2 pH |
| Bloom Time: | spring and fall |
| Maintenance: | Light to medium |
| Flower Color: | Light to deep shade of violet and purple, white, yellow, blue, and peach |
| Hardiness Zones: | 3-8 (USDA) |
| Toxicity: | non-toxic; safe for adults to handle |
How to Grow Violets (Viola)
Light
Violas require ample sunlight but not too much heat. Keep violas out in the open during fall, winter, or a cool spring. However, provide shade during summer or whenever there’s a hot afternoon. A good strategy is to plant violas adjacent to taller plants that provide shade.
Water
Water regularly, but allow the soil to breathe between intervals. Violas can withstand some water puddling, but they will thrive best if you wait until it is dry. Flooding the soil for prolonged periods can lead to mold growth on the flowers. Water until the soil is visibly moist but not saturated.
Soil
Plant violas in moist soil. Good choices include garden soil with added organic material or peat-based potting mix. The soil should also be slightly acidic. Peat moss is a great organic material that adds a slight acidity to the soil. Applying rotted manure is another way to enhance soil conditions. You do not need to ever apply mulch.
Fertilizer
It’s best to fertilize in the spring and late summer. This encourages adequate blooming by the time fall arrives. Use a slow-release fertilizer for best results. Liquid fertilizer is another good choice, especially when applied in early spring.
Pruning
If the flowers appear faded, remove by pinching off the blooms at the bottom of the stem. If you find the plant too overgrown for your liking, then it’s acceptable to trim the plants to three to four inches tall. Pruning by and large, however, isn’t necessary for maintaining optimal growth.
Pest Control
Violas are susceptible to intrusion from pests that feed off the flowers and leaves. Common species that feed on violas include aphids, slugs, whiteflies, and flea beetles. If you spot pests on your violas, use a natural insecticidal soap made from dish detergent and water. Mix in a spray bottle and spray on the flowers. A hose may also remove pests, but be careful, as the pressure from a hose may also damage the plants.
Are They Toxic?
Violas are not toxic and are safe for people to handle and even consume. However, the roots contain saponins. This organic chemical may have emetic effects, meaning it may induce vomiting. In low doses, violas are commonly used in phytotherapy; their leaves and flowers are used in various herbal medicines for children and adults alike.
Growing Violets from Seed
Seedlings won’t reach peak bloom until later in the season under colder climates. In order to combat this, a good strategy is to begin indoors for eight to 12 weeks before moving them to your garden. Follow these steps:
- Fill small pots with potting mix, filling it to a quarter of an inch below the pot’s outer edge.
- Insert two to three seeds in each pot.
- Cover the seeds completely with more potting mix. The seeds need total darkness to germinate.
- Keep the pots in a mildly warm location, around 65 to 70 degrees Fahrenheit. When the seeds begin to germinate in 10 to 14 days, move the pots to a window sill.
- Thin the pot once the first leaves begin to appear. Keep the temperature to 55 to 60 degrees Fahrenheit and top the soil with a water-soluble fertilizer.
- For the next 10 to 14 days, gradually increase the pot’s exposure to direct sunlight. Begin by keeping the pots outside during peak sunlight for two hours and gradually increasing the duration each day. Continue to use a water-soluble fertilizer to retain moisture.
- By the end of 14 days, the pots should be spending close to 24 hours outside. By this time, they are ready for a permanent transplant to an outdoor environment.


