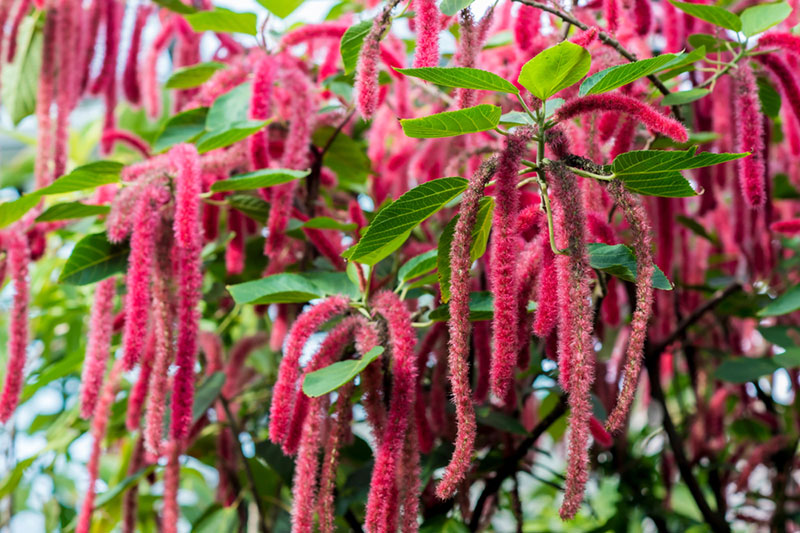
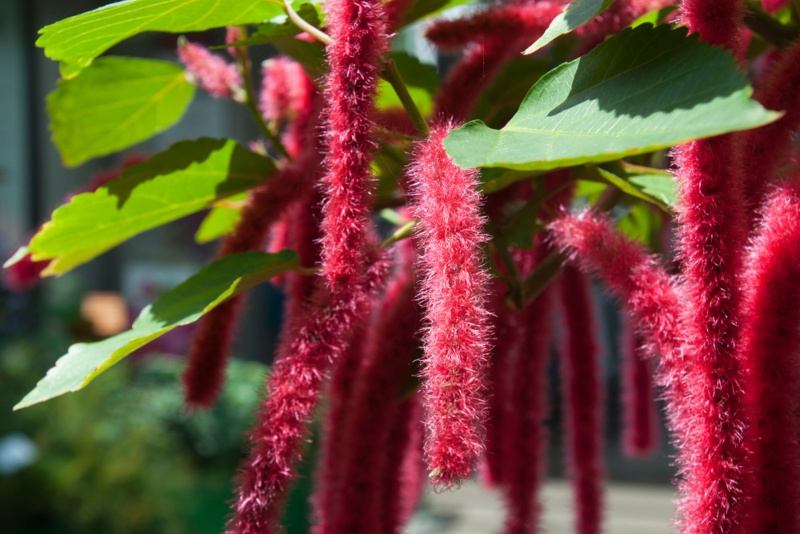
The chenille plant is prized for its long, textured red flowers that can be as long as 18″. There are also white varieties, but those are not common. The flowers often start as fuzzy balls and eventually lengthen into pendulous flowers.
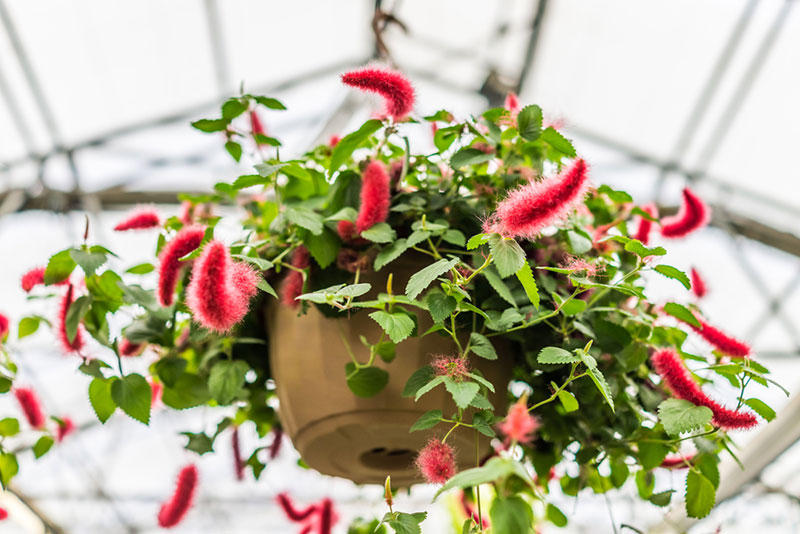
They thrive in zones 9 and 10 as a perennial, and they should be planted in the spring. Their bloom time is in the spring. They can grow as tall as 15′ in the wild, but they get to about 3′ high when planted in containers.
Light and Temperature Requirements
This plant grows well in either partial shade or full sunlight. Outside, full sun is usually recommended. If you will grow them inside, they need to be in a window that faces south to get the amount of sunlight needed. The chenille plant doesn’t tolerate cold temperatures, as it is originally from the tropics. The plant will not do well in temperatures of 59 and under.
Watering
When the plants are still establishing themselves, the soil needs to be kept moist. They should not, however, be watered too much. Make sure the soil is evenly moist but not soggy. Being too waterlogged will damage the root system. If you touch the soil and it’s moist but it isn’t sopping wet, it has the right amount of water. It’s also important to use a mister to spray the plant occasionally. You can do this in between its normal watering. If your chenille plant gets too dry in July and August, it can become a meal for spider mites. If you mist the plant and it causes whiteflies to scatter, you need to reduce their numbers by vacuuming them up with a hand vac. These insects can carry disease as well as drink your plant’s sap.
Soil & Fertilizing
The chenille plant is slightly drought-resistant and is not at all tolerant of salt. It should not be planted near the ocean. The best soils for this plant include loamy soils, clay and sand. It is not picky about its soil pH, thriving in pH levels from 5.0 to 7.5. If the soil doesn’t drain well, add some sand to it so that the roots of the chenille don’t stay too wet. The chenille plant grows quickly, and this makes it need a lot of nutrition from the soil to keep growing and flowering. You can help by fertilizing the soil once a week during the spring and summer growing seasons. Choose a balanced, half-strength fertilizer for flowers. If the flowers begin to turn yellow, add some compost or manure into the soil. If you are using potting soil, use a mix that is for succulents and cacti. You can also make its potting soil by adding sand to potting soil at a 1:2 mixture. You can also mix together sand, perlite and potting soil in an even mixture. This will help the soil to both drain well and hold onto enough water to keep it moist.
Deadheading and Pruning
Over the summer, the chenille plant can grow fast and start looking a bit scraggly as the season goes on. The blooms will fade and turn brown during this season. To keep the plant from getting too leggy and scraggly, you can cut it back after the summer. Cut the entire plant back to just 12″ tall. This will cause it to bloom with twice as many flowers the next year and keep it compact and full of branches. If you don’t want to cut it back, you can deadhead the brown flowers to keep the plant looking neater and more pleasing.
Propagation
The chenille plant is not easy to grow from seed, and if you save seeds from your plant and try to grow them, each of the resulting plants will be either male or female blooming. The male blooms are tiny and not showy like the red female flowers. It’s better to start with a young plant from a nursery or to grow another chenille plant from a cutting. To propagate from a cutting, cut a section of stems that are 4″ to 6″ long and that contain more than one leaf. Pick up some rooting hormone from your local nursery and apply it to the bottom. Then, place the stems into a rooting medium to help it to grow roots. Once it has a sturdy root system, it can be transplanted into potting soil or planted outside if it is spring. Be sure to keep its soil moist as it becomes established.


