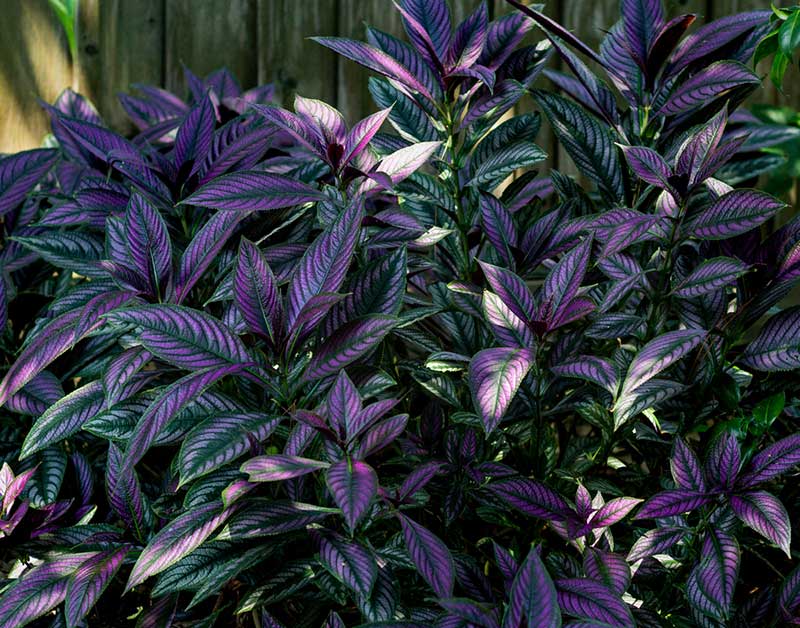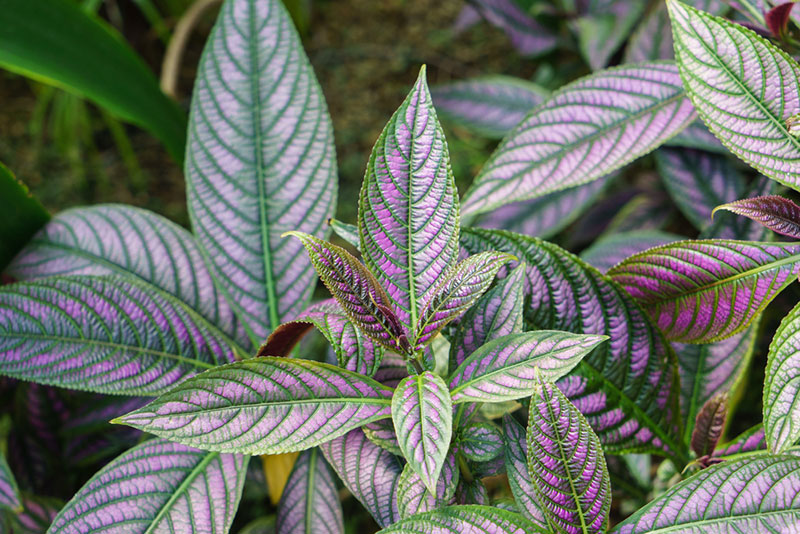
With brilliant shades of purple, green, and silver, the leaves of the Persian Shield plant (Strobilanthes dyerianus) are better in many gardener’s eyes than some flowering plants. The colors are vibrant and long-lasting and can brighten up even darker shady patches of the garden. Growing Persian Shield plants requires warm temperatures and higher humidity since it is technically a tropical semi-exotic plan. With the right care, it can be grown indoors as a potted plant or outdoors in the garden.
The foliage is definitely the defining quality of this plant and while the flowers are unique and striking, they are often pruned off to keep the plant compact and bushy. It is important to note that when grown indoors, it is less likely that flowers will form and the plant overall may be taller and spindlier than it would be outdoors. With proper pruning and care, it can be kept full and compact and also works well as a stand-alone potted plant or in dish gardens and hanging baskets.
In warm regions of Zone 8-11 it thrives best outdoors but will need to be protected from the occasional freeze. In colder regions, it either needs to be kept indoors or treated as an annual as it will likely die with the freezes each year.
How to Propagate Persian Shields Successfully at Home
Once you fall in love with the stunning beauty of the Persian Shield you will likely want to have many more. But buying new plants can be expensive. Thankfully, this plant is very easy to propagate at home without any fancy equipment or extras needed. All you need to do is follow these four easy steps and you can turn one plant into several without any added costs.
STEP 1: CUT A PIECE FROM A BRANCH TIP
Find a healthy branch and cut a tip off so that the piece is around 3 inches in length. Making the cut right above a node on the stem will usually yield the best results. It helps the cuttings root faster and also allows the cut branch to flush out with new growth easier. Also, be sure to make sure the stem you cut is not super soft and tender but also not too woody and hardened off.
STEP 2: REMOVE BOTTOM LEAVES AND PLACE IN MEDIA.
Next, you will want to strip away the bottom half of the branches so the stem is exposed. You can use rooting hormone powder on the stem and then place them in well-drained potting soil or sand to begin the rooting process. An easier and neater way is to put the stems in a cup of fresh clean water. In soil or sand, you will need to keep it moist but not overly wet while the roots form and will need to check after a week to see how the roots look. Roto growth can be easily monitored when cuttings are started in water so it will be s snap to see when the roots have gotten well established.
STEP 3: TRANSFER ROOTED CUTTING INTO SOIL.
When the roots on the cutting have hit around an inch in length it is time to plant the cuttings. With cutting grown in soil or sand, gently remove the cuttings and lightly shake off some of the loose media to inspect the roots. With cuttings grown in water, they can simply be removed and inspected before planting. Then place them in small pots of soil to strengthen and grow. Lightly tap the soil around the cutting to support it, but be sure to not compact the soil so much it damages the tender roots. Keep soil moist and provide soft balanced light to encourage healthy root and leaf growth.
STEP 4: PLANT OUTDOORS AND KEEP WELL WATERED.
Once cuttings have outgrown the starter pots, they can be pumped up into larger pots as needed and grown indoors. If they are being planted outside wait till the root ball has become established and there is no longer a risk of freezes. New plantings will often experience some level of shock, particularly when first planted outdoors. But they will recover and begin to thrive so long as they are taken care of during this transitional time. Now you have even more amazing Persian Shields to enjoy!