Cold frame gardening involves using a cold frame as a tool to extend the gardening season. A cold frame is usually placed over garden vegetables to protect them from freezing temperatures. It can be used in the spring to start veggies two to three weeks earlier than normal for your area and in the fall to protect plants from early fall frosts.
What is a cold frame?
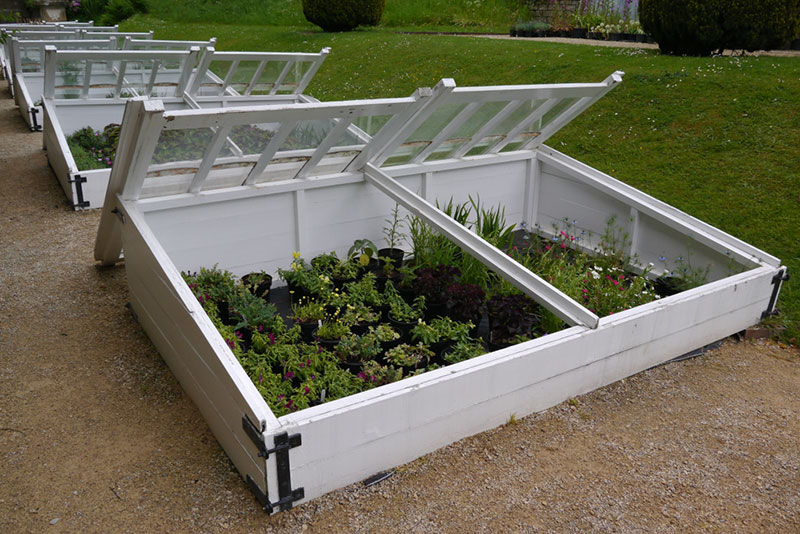
A cold frame can be as simple or as elaborate as you wish. It typically consists of a bottomless box with either heavy-weight plastic or glass as a cover. It can also consist of PVC hoops set up to create a tunnel over rows in the garden and covered with plastic. Technically, an unheated greenhouse is a large cold frame.
What are the advantages of cold frames?
Cold frames allow you to plant earlier in the spring and are ideal for starting cool season crops like salad greens, radish and members of the cabbage family weeks earlier in the spring. The cold frame absorbs the heat from the sun creating a warm protected area inside.
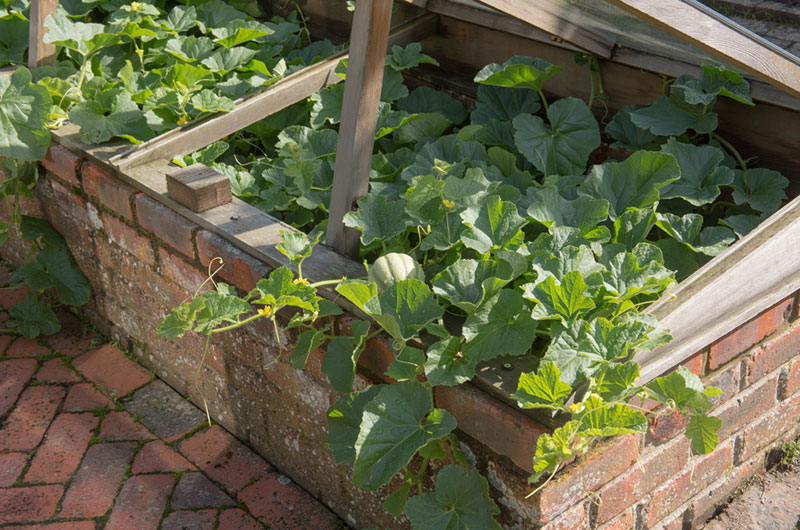
Cold frames can also be placed over warm season crops in the fall to extend harvest time. This works well if melons, cucumbers or even beans have not matured when the first fall frost threatens. But beware that some crops, like cucumbers, may not produce well late in the fall despite your efforts to protect them with a cold frame as they rely on hours of sunlight they receive to produce well. Waning hours of sunlight in the fall may cause their growth to slow and decrease fruit production.
Cold frames can also be used to plant fall crops and extend the harvest into the winter in southern locations but are limited for this use in northern climates. However, cool season crops like salad greens, spinach and chard can often be grown well into the fall with the help of a cold frame in northern climates.
What is the easiest cold frame to make?
- Milk Jugs: A gallon milk jug with the bottom cut out works as a simple cold frame. Place the jug over tender crops like cucumbers or tomatoes when an unexpected late spring frost is in the forecast. Firm soil around the edge of the milk jug to prevent it from blowing over in the night. Leave the jug over the plants during the day but open the top to create air circulation. Close the top at night until all danger of frost has passed and your plants show vigorous growth. Some prefer to leave these simple cold frames in place until the plants fill the container before removing it completely.
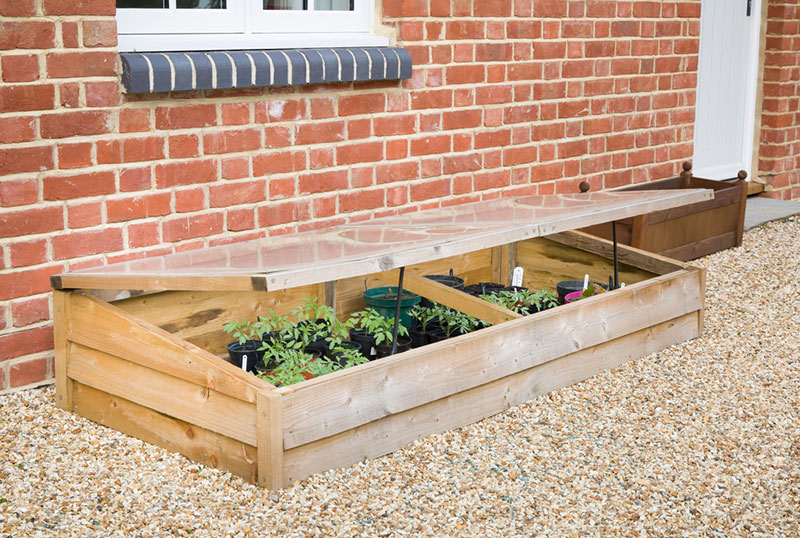
- Covered Raised Beds: If you have raised beds, you can transform them into cold frames by covering them with an old window or with plastic in the spring. If the bed is deep enough, you can plant your seedlings directly in the raised bed several weeks before normal planting time and simply remove the cover when the weather warms.
How to you get a cold frame ready in the spring?
- For best results, you will want to position your cold frame in the garden two to three weeks before you intend to plant your seedlings. This warms the soil, so your seedlings will thrive.
- Plant the seedlings in the soil and close the top of the cold frame at night.
- Open the top of the cold frame during the daytime on warm days to allow air to circulate. Keep it closed, or partially open if temperatures dip during the day.
Do you need to put the cold frame in the garden?
No. You can use your cold frame anywhere where there is adequate sunlight for your plants. Placing potted seedlings in the cold frame until ready to plant them in the garden will give them a head start, too. In fact, some prefer this method as it allows you to harden off your plants before planting time.
Hardening off refers to exposing your plants to the elements in a shaded or secluded location. With a cold frame, opening the sides and top during the day will allow the plants to adjust to outside conditions long before planting them in the garden.
How do you build a cold frame?
- You can make a cold frame by creating a rectangular box without a bottom. While they are often built with wood, you can use material you have on hand. Cinder blocks, bricks and scrap wood work well for making a cold frame. You can even remove the bottom of old crates for a simple cold frame.
- Cover the top of the cold frame with glass or plastic. An old window or discarded shower door makes an excellent top to your cold frame. But you can also make a simple wooden frame to fit the top of the cold frame and cover it with plastic.
- Use hinges to attach the top of the cold frame as you will need a way to control the heat and humidity in your cold frame. Being able to open the cold frame is vital.


